
Map Builder
Create, style, and publish maps without leaving Webflow
A guided one-time setup, then full visual control over markers, tooltips, layers, and layout.
Includes step-by-step setup and one-click export to your Webflow canvas.
What Map Builder Is For
Map Builder is designed for marketing websites where maps need to look on-brand, stay easy to manage, and not turn into a maintenance headache.


How to Set Up Map Builder
Map Builder lets you design your map first. When you’re ready to publish, we guide you through a short setup to add it to your Webflow site.
Step 1: Build Your Map in Map Builder
Open the app and start with markers. Add locations, customize tooltips, toggle map layers, and adjust the map until it looks right.
Step 2: Preview changes as you go
Every change updates instantly, so you can see how the map behaves before publishing.
Step 3: Publish and follow the setup steps
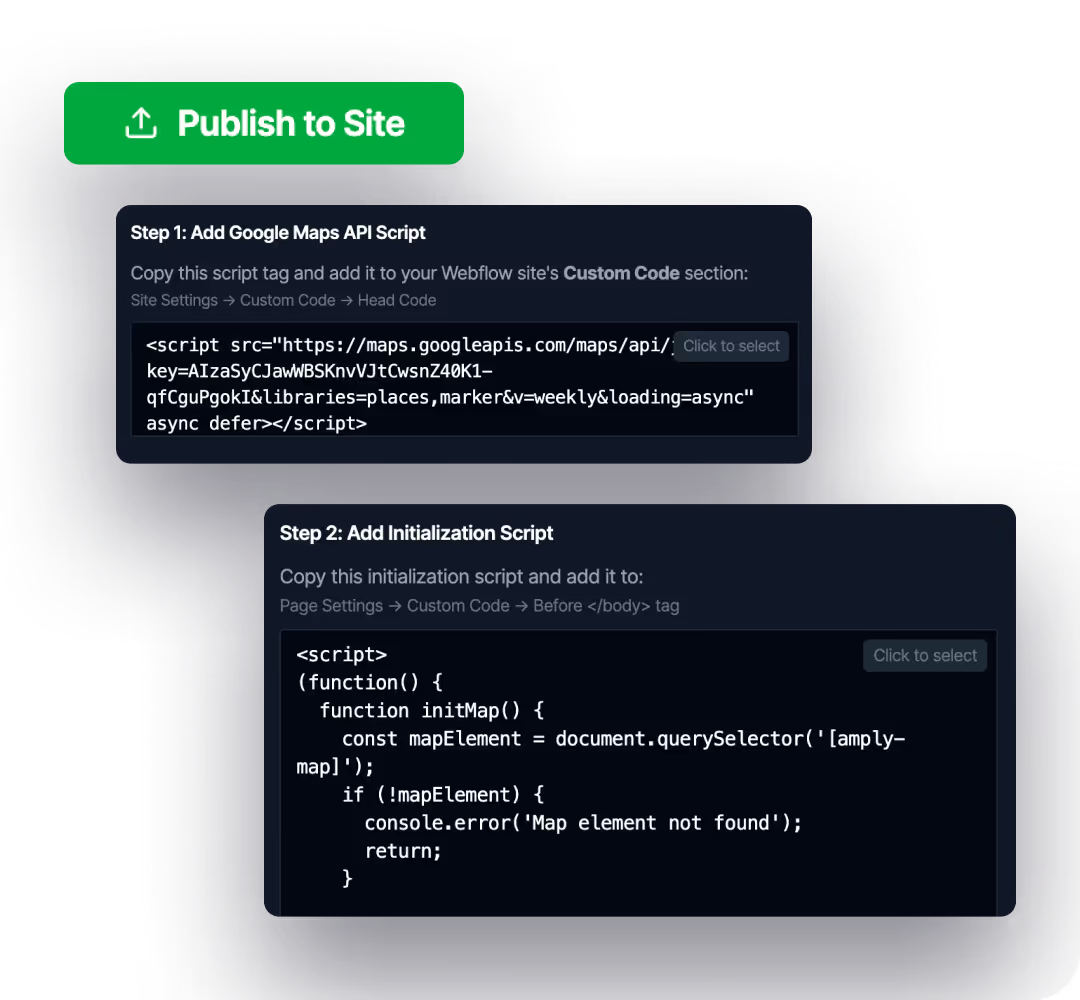
When you publish your site, Map Builder shows a setup popup with clear instructions:
- Add the Google Maps API script
- Add the initialization script
This setup is required once per site.
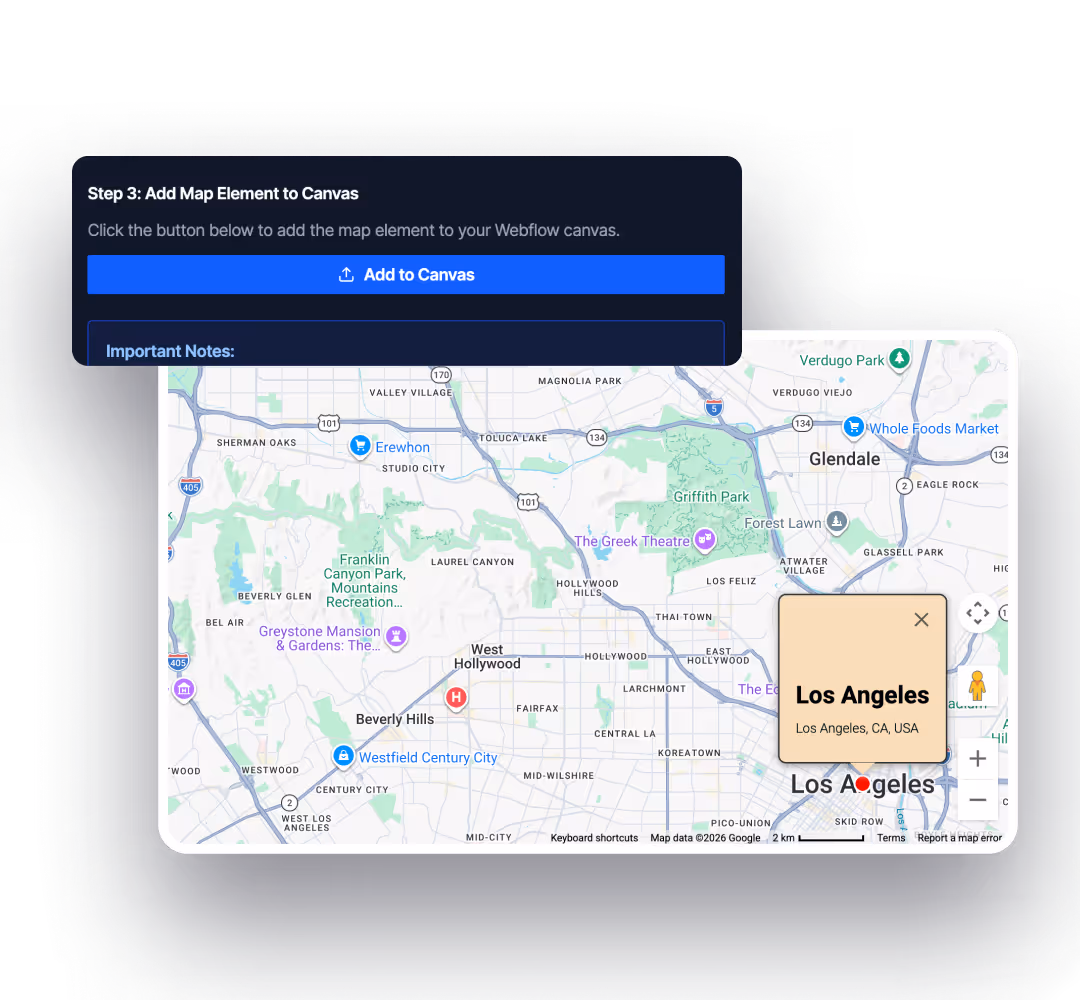
Step 4: Add the map to your canvas
Click Add to Canvas and Map Builder automatically inserts the map element into your Webflow layout.
What you can control
Map Builder gives you control over how your map looks and behaves, while keeping everything easy to manage inside Webflow.
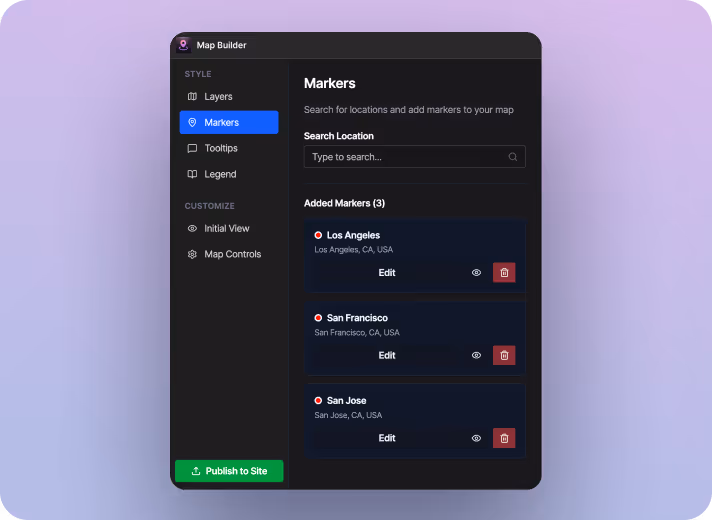
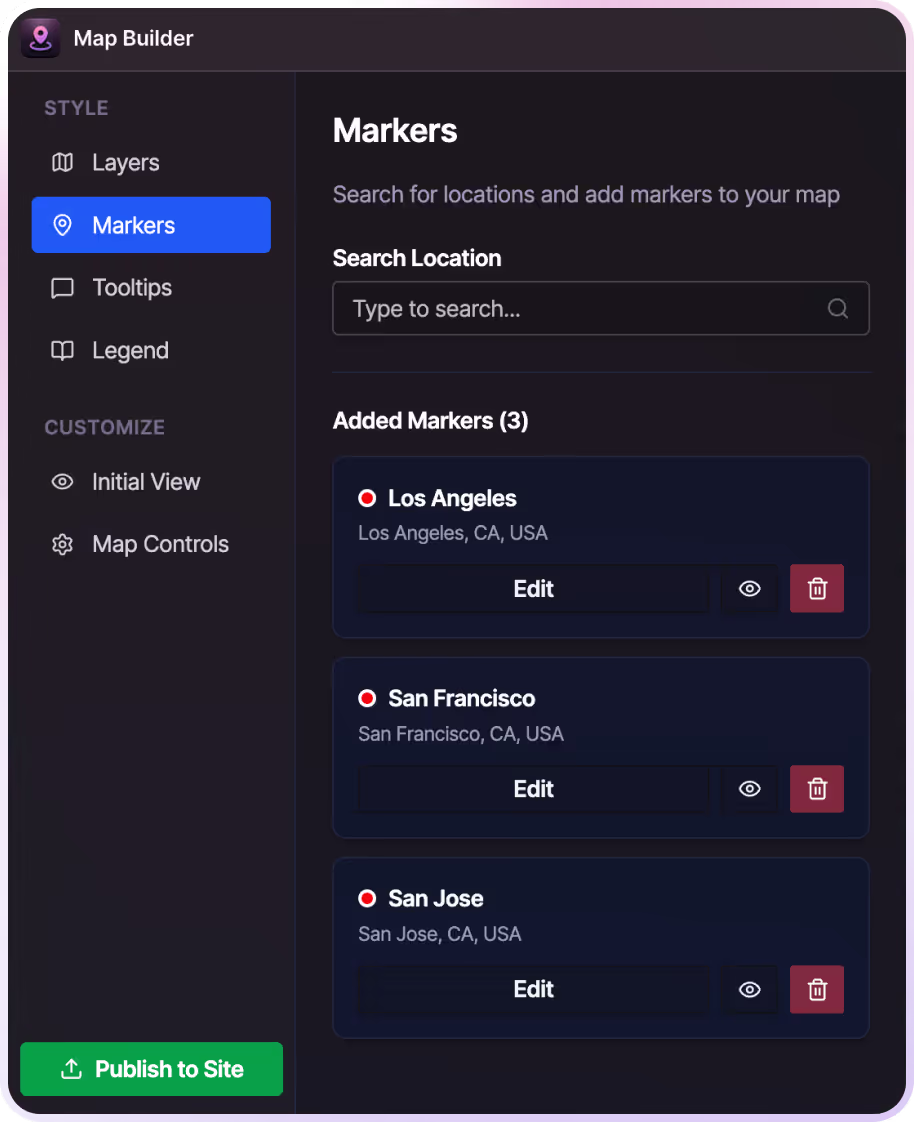
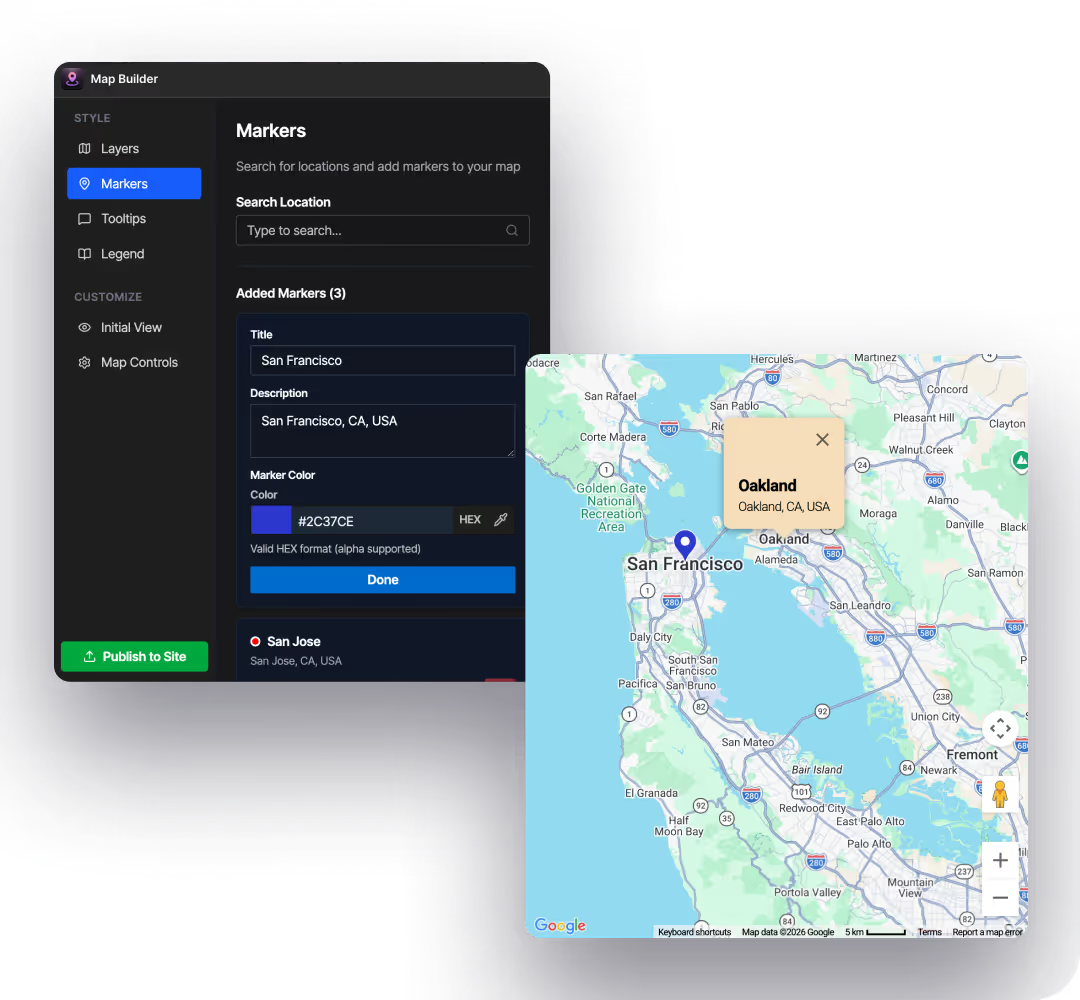
Markers
Add locations using Google Places and manage multiple markers from one place. You can control visibility, order, and default behavior, which works well for location pages, events, and multi-city sites.
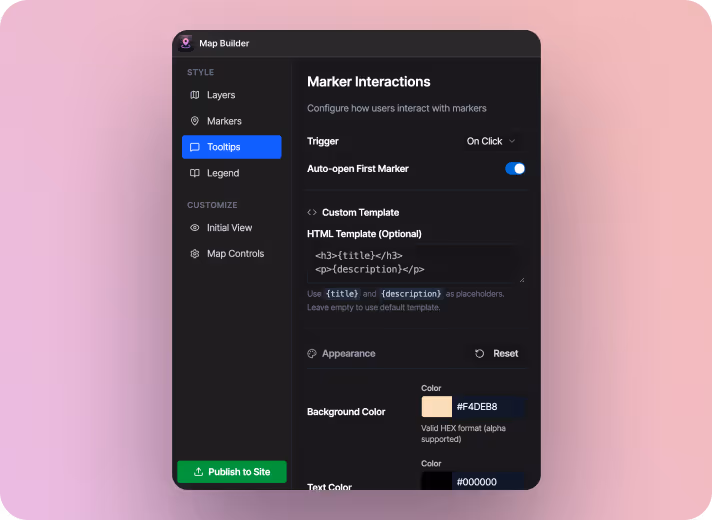
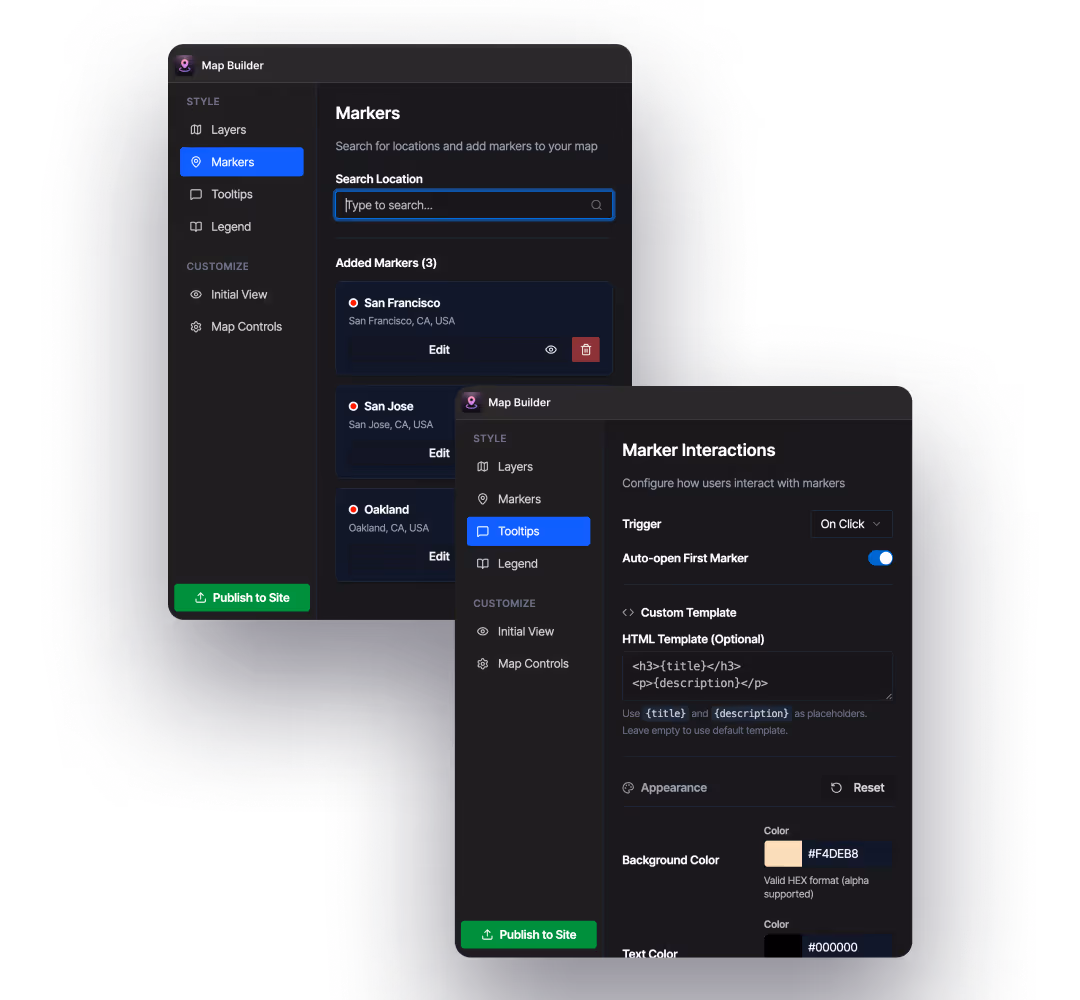
Tooltips
Customize tooltips to match your site’s design. Control colors, fonts, spacing, and when tooltips open, with simple placeholders for titles and descriptions.
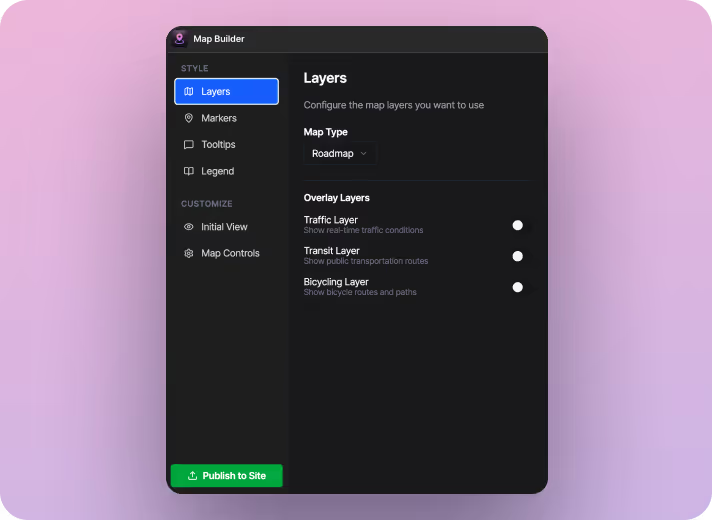
Map Layers
Toggle layers like traffic, public transit, and bicycling routes based on what context your users need.
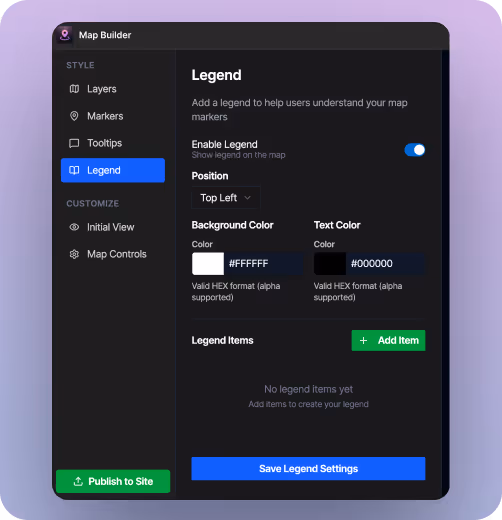
Legend
Add an optional legend to help users understand your markers. You can control its position, colors, and items so it fits naturally into your map without cluttering the layout.
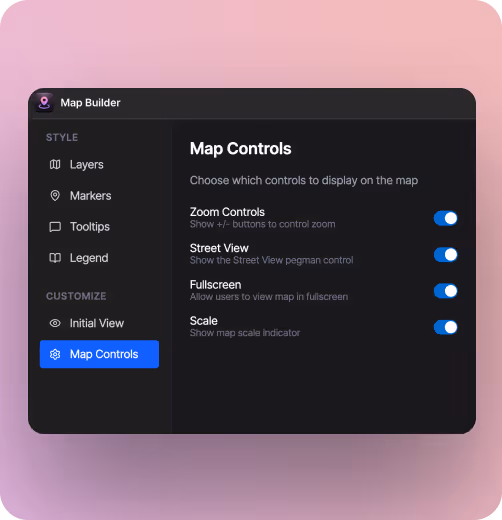
Map behavior and controls
Set the initial view and decide which controls to show, including zoom, fullscreen, street view, scale, and an optional legend.

Build and publish maps without breaking your Webflow workflow
Map Builder lets you design maps visually, manage locations easily, and add them to your site with a guided setup when you’re ready to publish.

