The Ultimate Guide to A/B Testing in Webflow: Tools, Tips, and Best Practices (2026)
Cade Biegel
April 7, 2026
14
min
Key Takeaways
A/B testing helps you make decisions based on real user behavior, not assumptions. It’s one of the most reliable ways to improve conversions on a Webflow site.
Webflow doesn’t have native A/B testing (unless you use Webflow Optimize), so most teams rely on tools like VWO or Optibase to run experiments.
Start with high-impact areas like headlines, CTAs, pricing sections, and forms. Testing minor visual changes without context usually doesn’t move the needle.
Always test one variable at a time. If you change too many things, you won’t know what actually caused the result.
Run tests long enough to reach statistical significance. Ending tests too early is one of the most common mistakes.
Traffic volume matters. Low-traffic sites should focus on bigger changes instead of small tweaks to see meaningful results.
Site speed and performance can affect test accuracy. Heavy scripts from third-party tools can slow down your site and skew results.
Use a clear hypothesis before every test. Know what you’re testing, why you’re testing it, and what outcome you expect.
A/B testing is not a one-time task. Consistent testing and iteration lead to better long-term conversion improvements.
Combine A/B testing with qualitative data like heatmaps and session recordings to understand why users behave a certain way, not just what they do.
Fast forward to 2026 and A/B testing has evolved far beyond swapping button colors. Webflow now has its own native testing and personalization platform, Webflow Optimize, powered by the AI technology it acquired from Intellimize. Third-party tools like Optibase have matured into full CRO suites with heatmaps, session recordings, and AI-driven traffic allocation. And AI can now generate, test, and optimize variants automatically, surfacing winners in days instead of weeks.
But the core principle hasn't changed: small, data-backed changes compound into massive results. Lattice saw a 20% increase in site-wide conversions through systematic testing. Walker & Dunlop achieved a 56% increase in form fills. These aren't outliers, they're what happens when you test consistently and methodically.
This guide covers everything you need to run effective A/B tests in Webflow, from choosing the right tool to avoiding the mistakes that invalidate your results.
Understanding A/B Testing
What is A/B Testing?
A/B testing, also known as split testing, is a method where you compare two versions of a webpage to determine which one performs better. By showing different versions (Version A and Version B) to similar visitors at the same time, you can analyze which one yields better results based on specific metrics such as conversion rates, click-through rates, or user engagement.
For example, you might create two different headlines for the same landing page and split the traffic so that half of the visitors see headline A and the other half see headline B. By tracking the actions taken by each group, you can determine which headline is more effective.
Why Should You Do It?
A/B testing is crucial for optimizing your website because it allows you to make data-driven decisions. Here’s how A/B testing can help you:
Improved Conversion Rates: By testing different versions of your site, you can identify which elements drive more conversions, whether it's signing up for a newsletter, making a purchase, or filling out a contact form.
Enhanced User Experience: Testing different designs, content, and functionalities helps you understand what resonates with your audience, leading to a more enjoyable user experience.
Data-Driven Decisions: Rather than relying on guesswork or intuition, A/B testing provides concrete data to support your decisions, reducing the risk of implementing changes that could negatively impact your site.
Reduced Bounce Rates: By optimizing elements that keep visitors engaged, you can reduce the number of people who leave your site without interacting further.
Higher ROI: Maximizing the effectiveness of your site’s elements means you get more value out of your existing traffic without the need for additional marketing spend.
Types of A/B Tests
There are 3 major types of A/B tests, and the one you use largely depends on your goals.
Simple A/B Test: This involves testing two versions of a single element (e.g., headline, button color) to see which one performs better.
Multivariate Testing: This method tests multiple elements simultaneously to see how different combinations affect the outcome. It's more complex but can provide deeper insights.
Split URL Testing: This involves creating entirely different URLs for each version of the page. This is useful for major redesigns or testing entirely different layouts.
By understanding and experimenting with these different types of tests, you can more effectively optimize various aspects of your Webflow site to improve performance and conversions.
Essential Tools for A/B Testing
There are many great tools out there for A/B testing like Crazy Egg, Optimizely, Convert etc. But we prefer Webflow Optimize, VWO and Optibase and we’ll tell you why.
Webflow Optimize
Webflow Optimize is Webflow's native testing and personalization platform, built on the AI technology from its Intellimize acquisition. It's the most deeply integrated A/B testing solution for Webflow sites, no external scripts, no third-party setup, no performance tradeoffs.
What makes it different:
AI-powered optimization. Webflow Optimize doesn't just split traffic 50/50 and wait. Its AI continuously learns which content performs best for each visitor segment and dynamically allocates traffic to winning variants in real time. This means faster results and less wasted traffic on underperforming versions.
1:1 personalization. Go beyond A/B testing into true personalization, serving different headlines, CTAs, images, and page sections to different visitors based on behavior, device, location, UTM source, and even firmographic data from integrations with Salesforce, HubSpot, 6sense, and Demandbase.
Native Webflow experience. Create and edit variants directly in the Webflow Designer. No visual editor overlays, no code injections, no flicker. What you build is what visitors see.
Enterprise integrations. Connect with your CRM, MAP, and ABM platforms for account-based personalization, show different content to different companies visiting your site.
Pricing: Starts at $299/month. Best suited for teams with meaningful traffic volume where the ROI from AI optimization justifies the investment. Includes up to 5 concurrent tests on the standard plan; enterprise plans offer unlimited tests and advanced targeting.
Best for: Mid-market to enterprise Webflow sites that want testing and personalization in one native platform, without managing third-party tools.
VWO (Visual Website Optimizer)
VWO is a really powerful A/B testing platform that makes it easy to test and optimize your website. Here’s why we like VWO:
Visual Editor: VWO offers a drag-and-drop visual editor, allowing you to create and modify test variations without any coding skills.
Multivariate Testing: Besides simple A/B tests, VWO supports multivariate testing, so you can test multiple elements simultaneously.
Heatmaps and Session Recordings: They provide visual insights into user behavior, helping you understand how visitors interact with your site.
Targeting and Segmentation: You can segment your audience and target specific groups based on various criteria, ensuring your tests reach the right people.
Analytics Integration: VWO integrates well with your exisiting analytics tools like Google Analytics, making it easy to get accurate data of your tests.
Optibase
Optibase is the most popular third-party A/B testing tool built specifically for Webflow. It installs natively through the Webflow Marketplace and lets you set up tests directly in the Webflow Designer, no developers, no custom code, and no performance impact.
Key features:
A/B, split URL, and multivariate testing - test individual elements, entirely different pages, or multiple changes at once.
Built-in heatmaps and session recordings - visualize where visitors click, how far they scroll, and replay real user sessions to understand behavior behind the numbers. Available on all paid plans.
AI traffic split - automatically routes more traffic to winning variants in real time, so you're not wasting impressions on underperformers while waiting for statistical significance.
Personalization experiments - serve different content to different audience segments based on behavior, device, location, and more.
Native integrations - connects with GA4, Mixpanel, HubSpot, and any analytics tool via GTM or custom events.
Pricing: Free plan (up to 5K visitors/month). Paid plans start at $69/month (Basic), $139/month (Business), and $289/month (Professional). Annual billing saves roughly 15%.
Best for: Small to mid-size Webflow sites that want a purpose-built, affordable testing tool with built-in analytics. If Webflow Optimize's $299/month price point is too steep, Optibase is the best alternative.
Google Analytics 4 (GA4) - The Free Option
If you're not ready to invest in a dedicated testing tool, GA4 offers basic A/B testing capabilities at no cost. It's not as polished as Optibase or Webflow Optimize, but it works, and most Webflow sites already have GA4 installed.
How it works: GA4 doesn't split traffic automatically. You'll need to create your page variants in Webflow, then use UTM parameters or custom events to track which version each visitor sees. It's more manual, but you get full control over tracking and reporting within a tool you already know.
Best for: Teams just getting started with A/B testing, or sites with limited traffic where a paid tool doesn't yet make sense. Use GA4 to validate that testing delivers results for your site before investing in a dedicated platform.
Which Tool Should You Choose?
Tool
Best For
A/B Testing
AI Optimization
Heatmaps
Pricing
Webflow Optimize
Mid-market to enterprise
✅
✅ AI-powered
Via integrations
From $299/mo
Optibase
Small to mid-size Webflow sites
✅
✅ AI traffic split
✅ Built-in
Free – $289/mo
VWO
Feature-rich CRO needs
✅
✅
✅ Built-in
Free – ~$574/mo
GA4
Budget-conscious / beginners
✅ (manual)
❌
❌
Free
Our recommendation: If you're running a Webflow site with meaningful traffic and want the most native experience, start with Webflow Optimize or Optibase. If you're testing the waters or have limited traffic, GA4 is a solid free starting point. VWO makes sense if you need a full-featured CRO platform that extends beyond Webflow.
Step-by-Step Guide to A/B Testing (with VWO)
Let's take an example to make this easy to understand. Suppose you want to test two versions of the hero headline on your Webflow site to see which one performs better. Here’s how you can set up a test using VWO:
Step 1: Sign Up and Create an Account
Visit the VWO Website: Sign up on the VWO website or login if you already have an account.
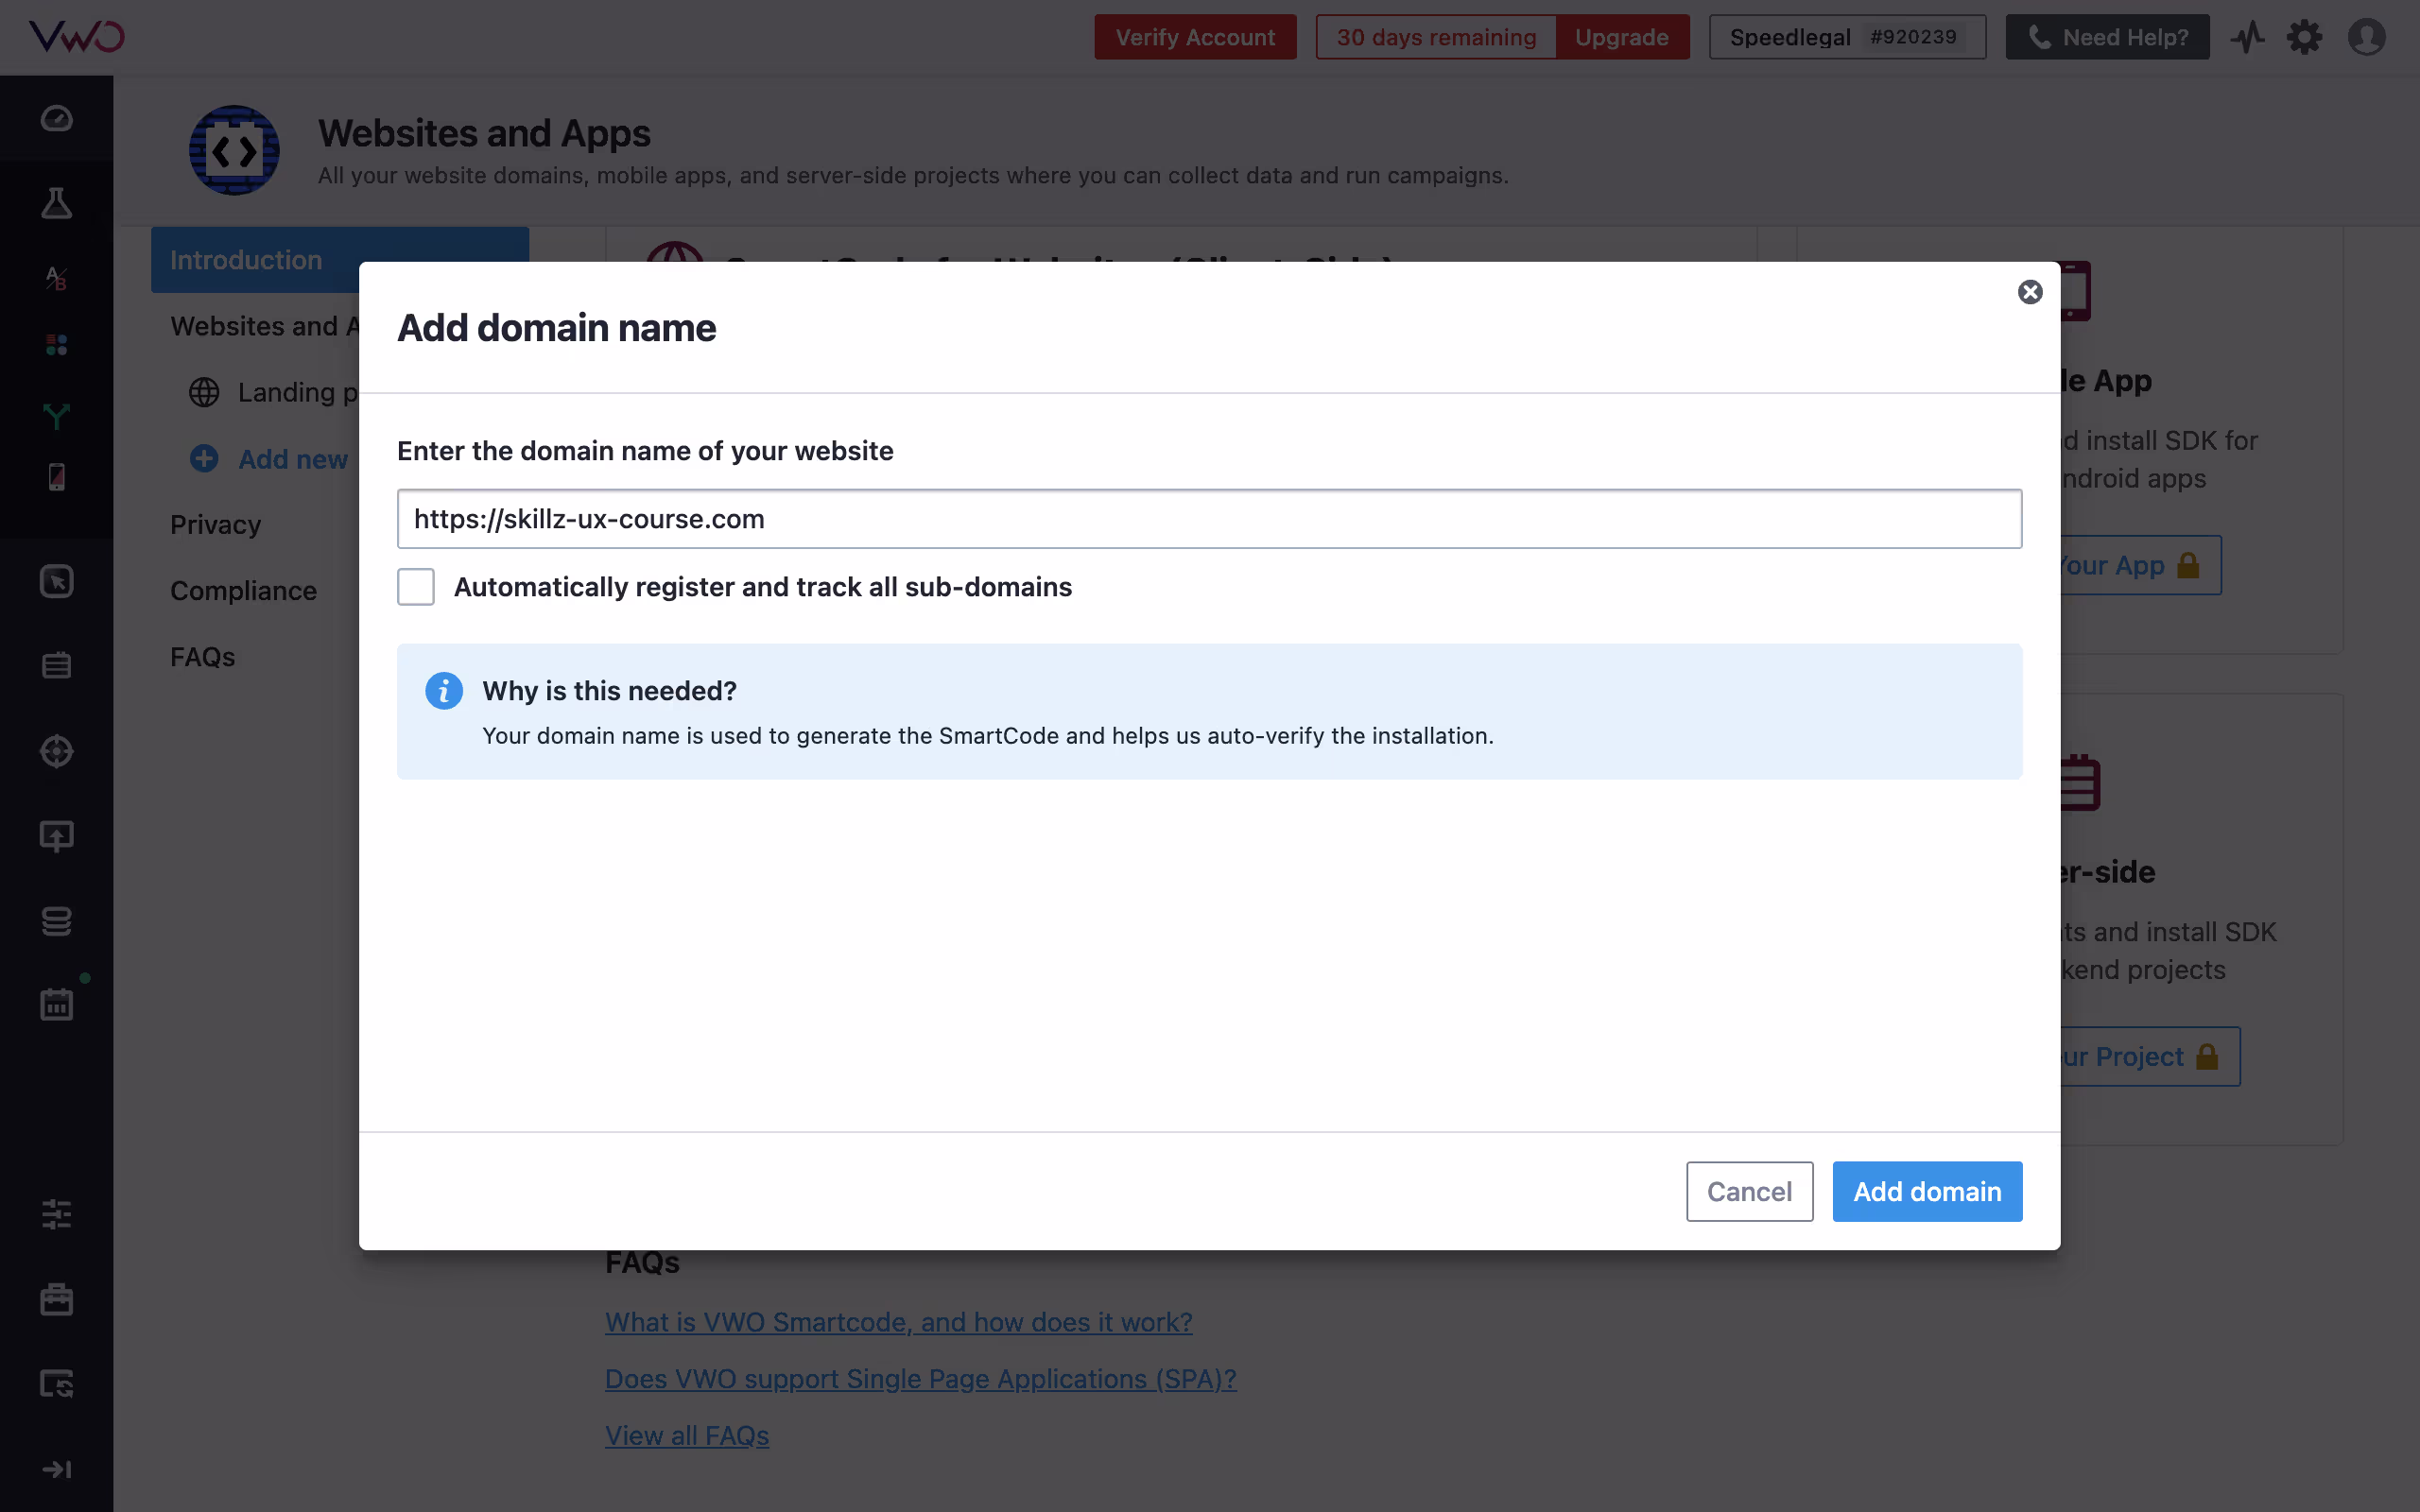
2. Create a New Project: Once logged in, create a new project for your Webflow site. Enter your website URL and name your project accordingly.
Step 2: Install VWO on Your Webflow Site
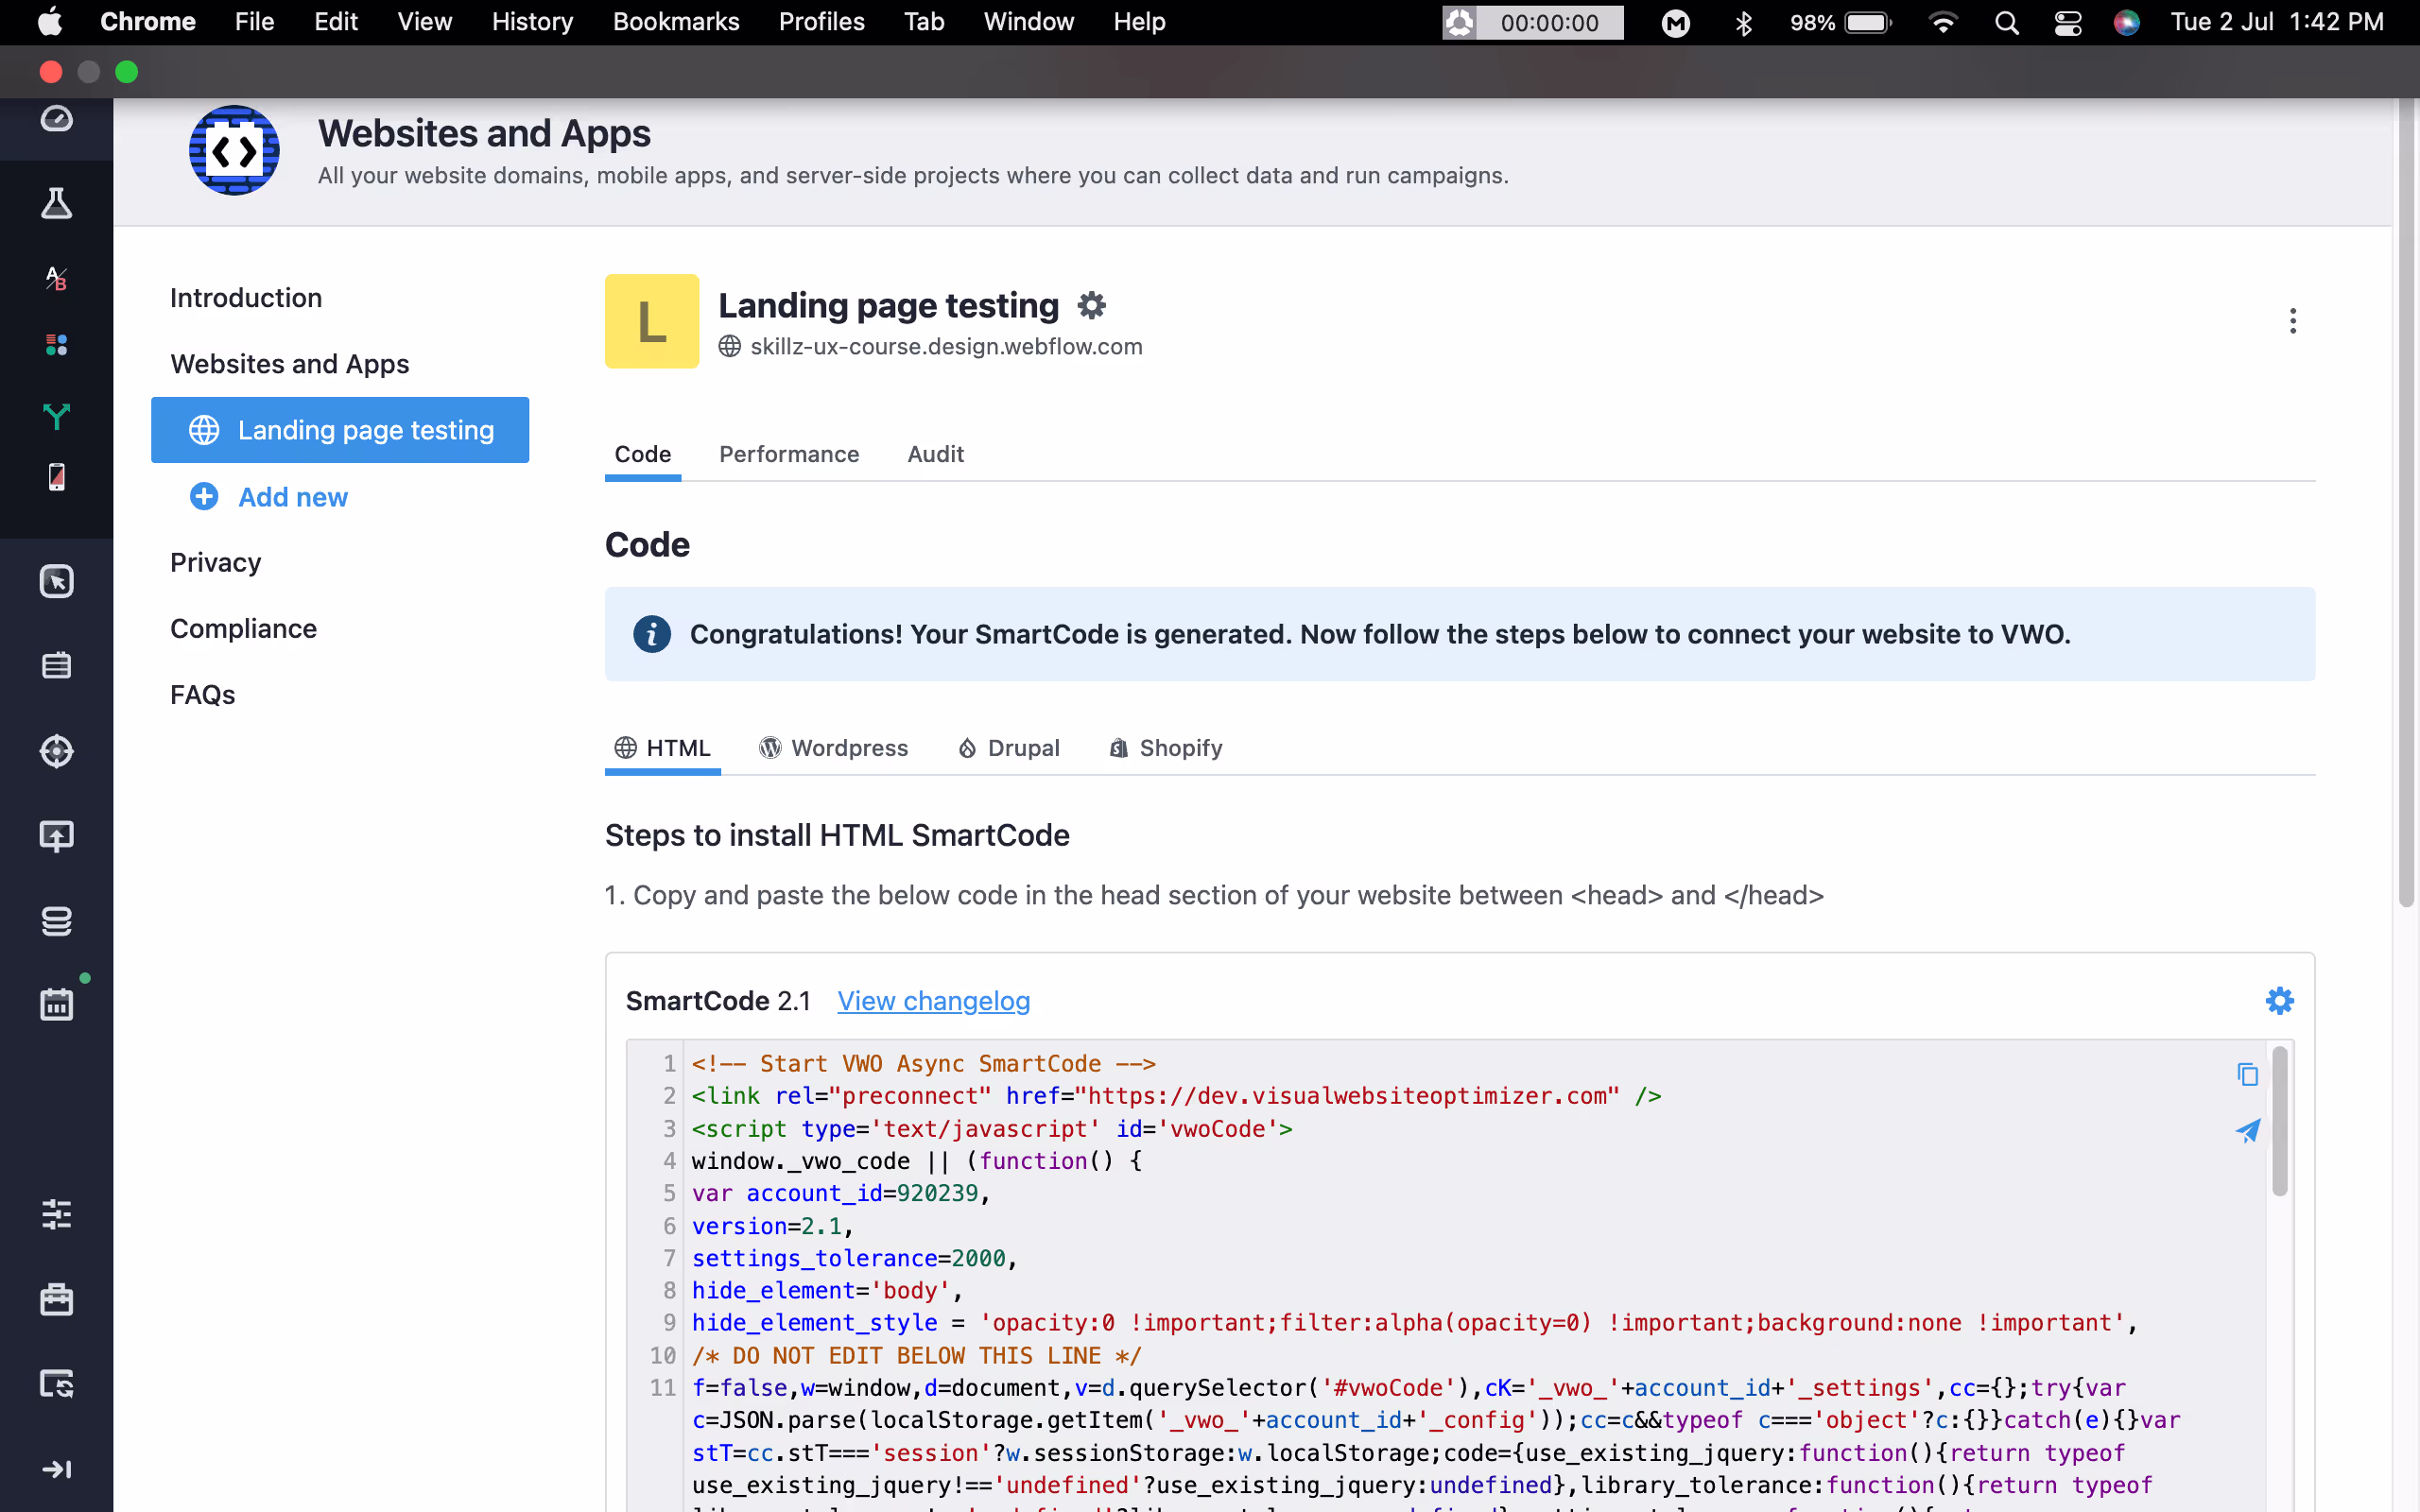
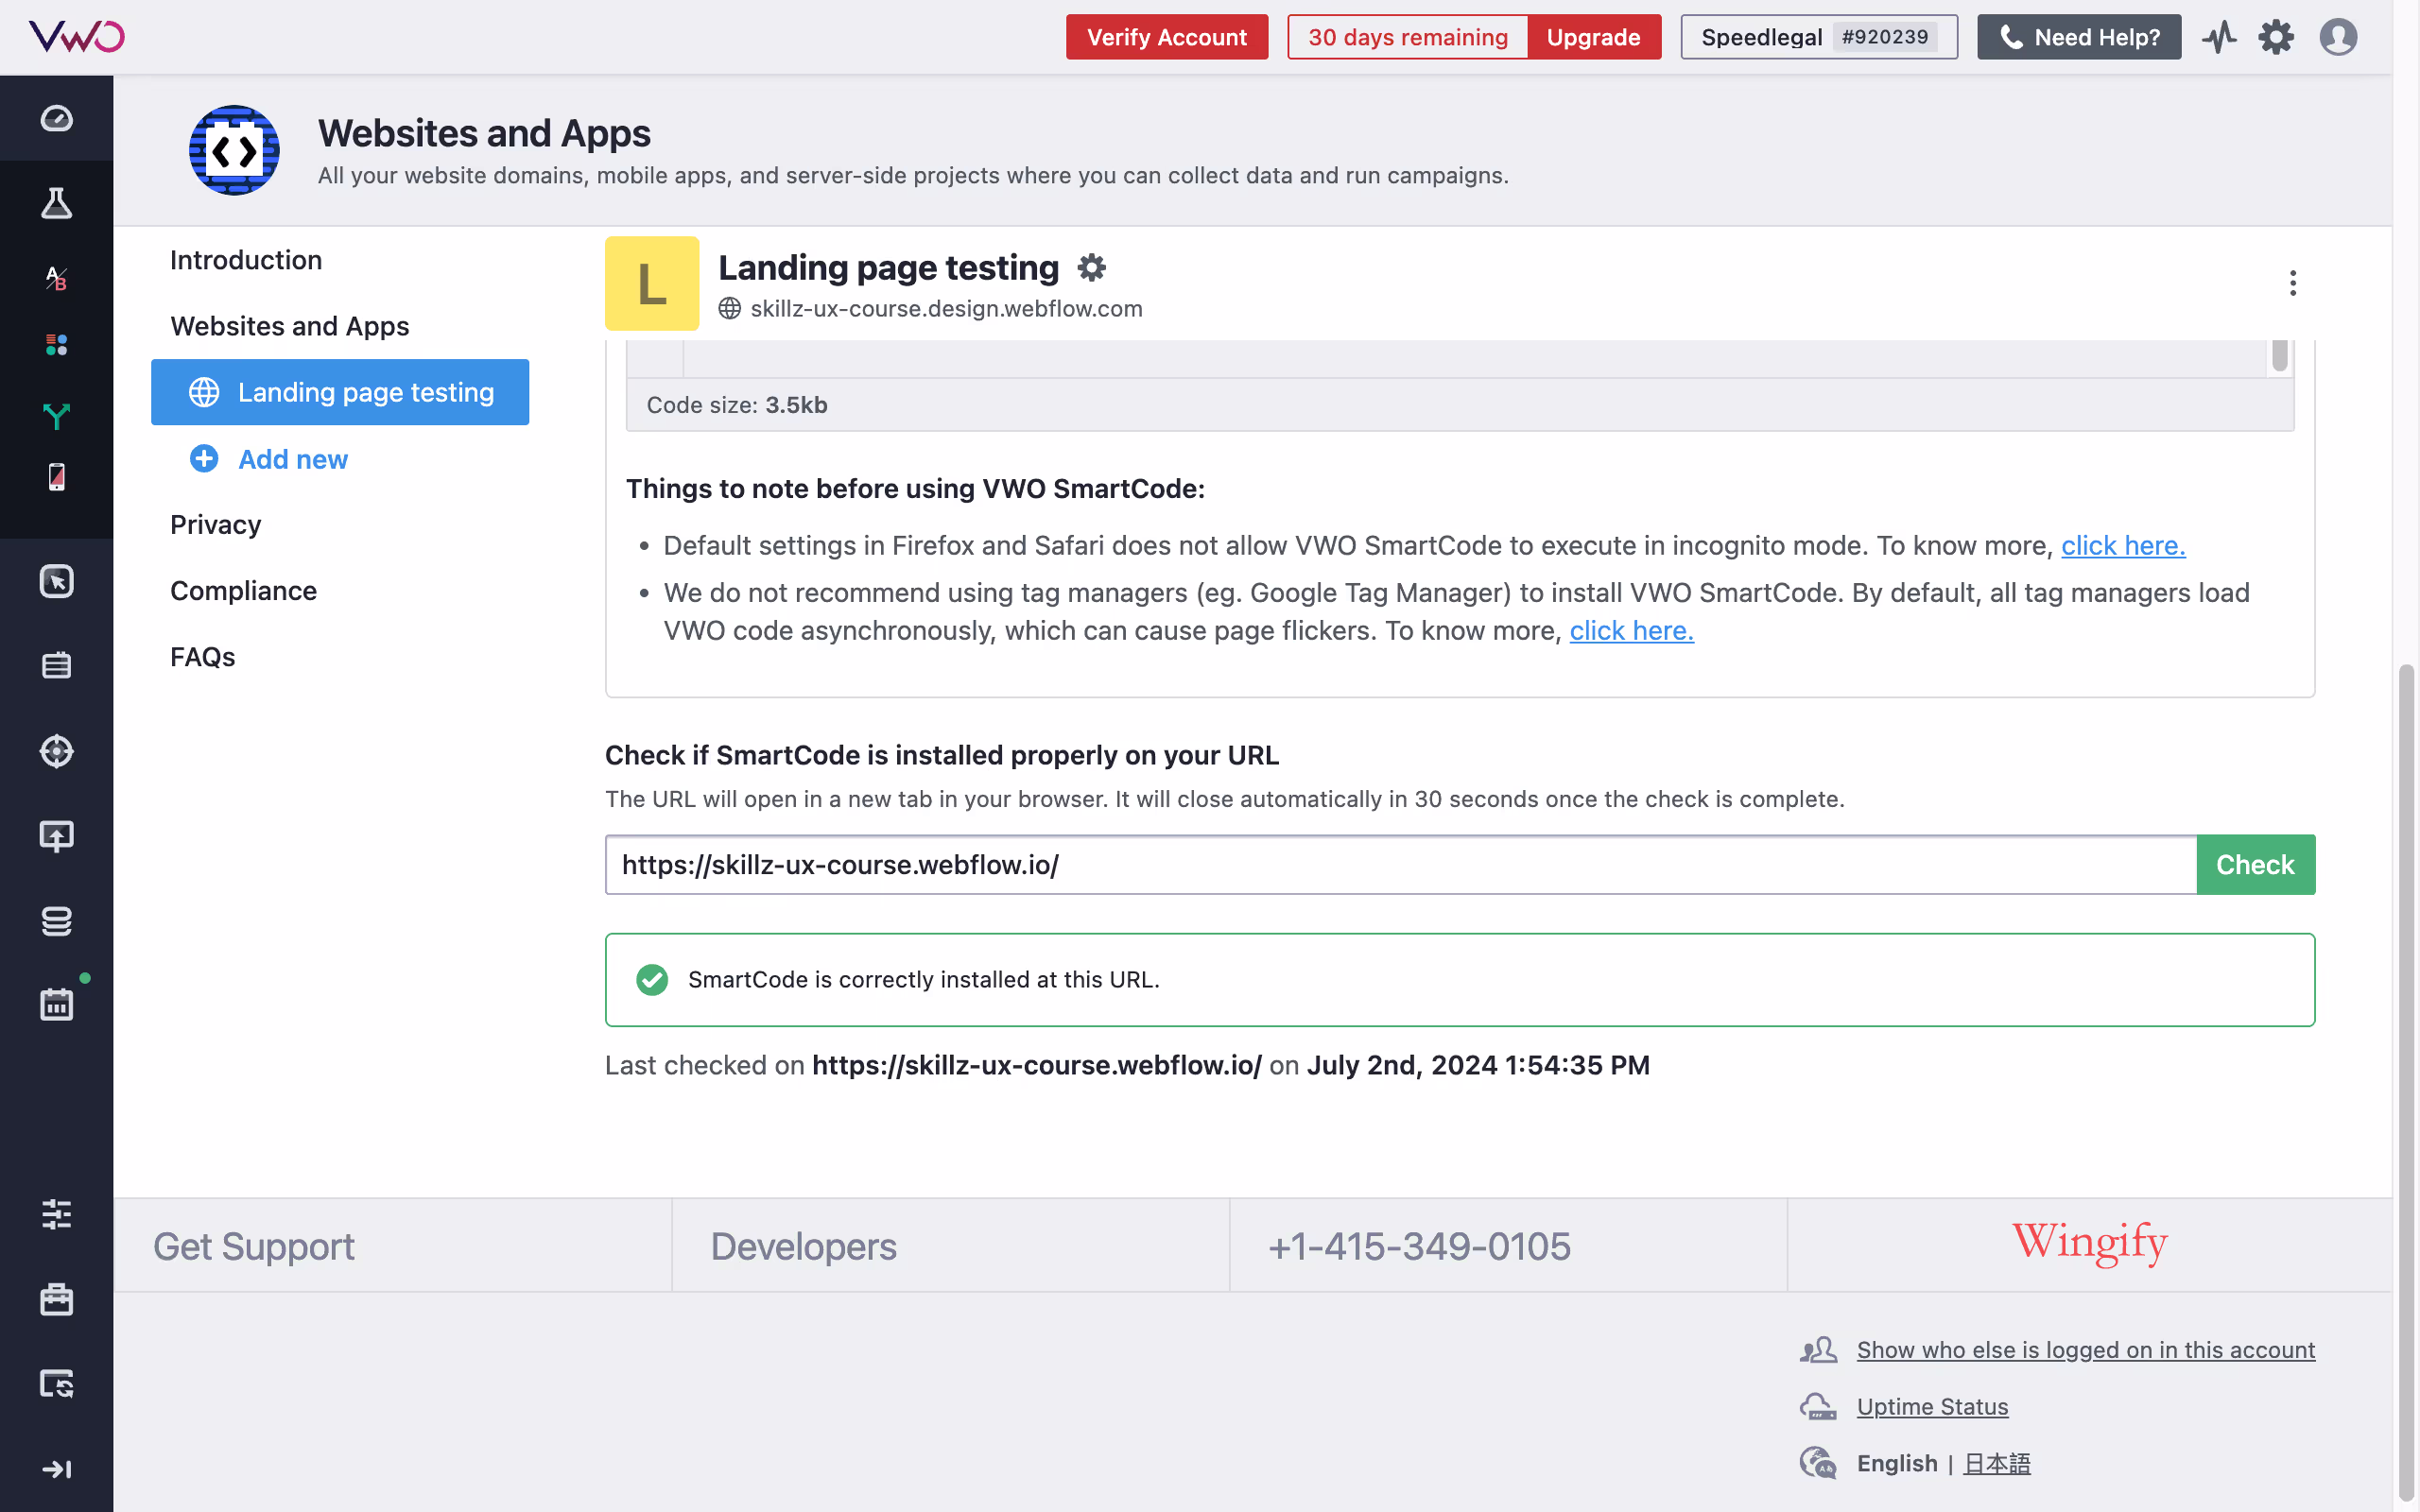
1. Get the Tracking Code: Once you add your website, you’ll land on a dashboard where you’ll see the smart code generated for your website. Copy the code.
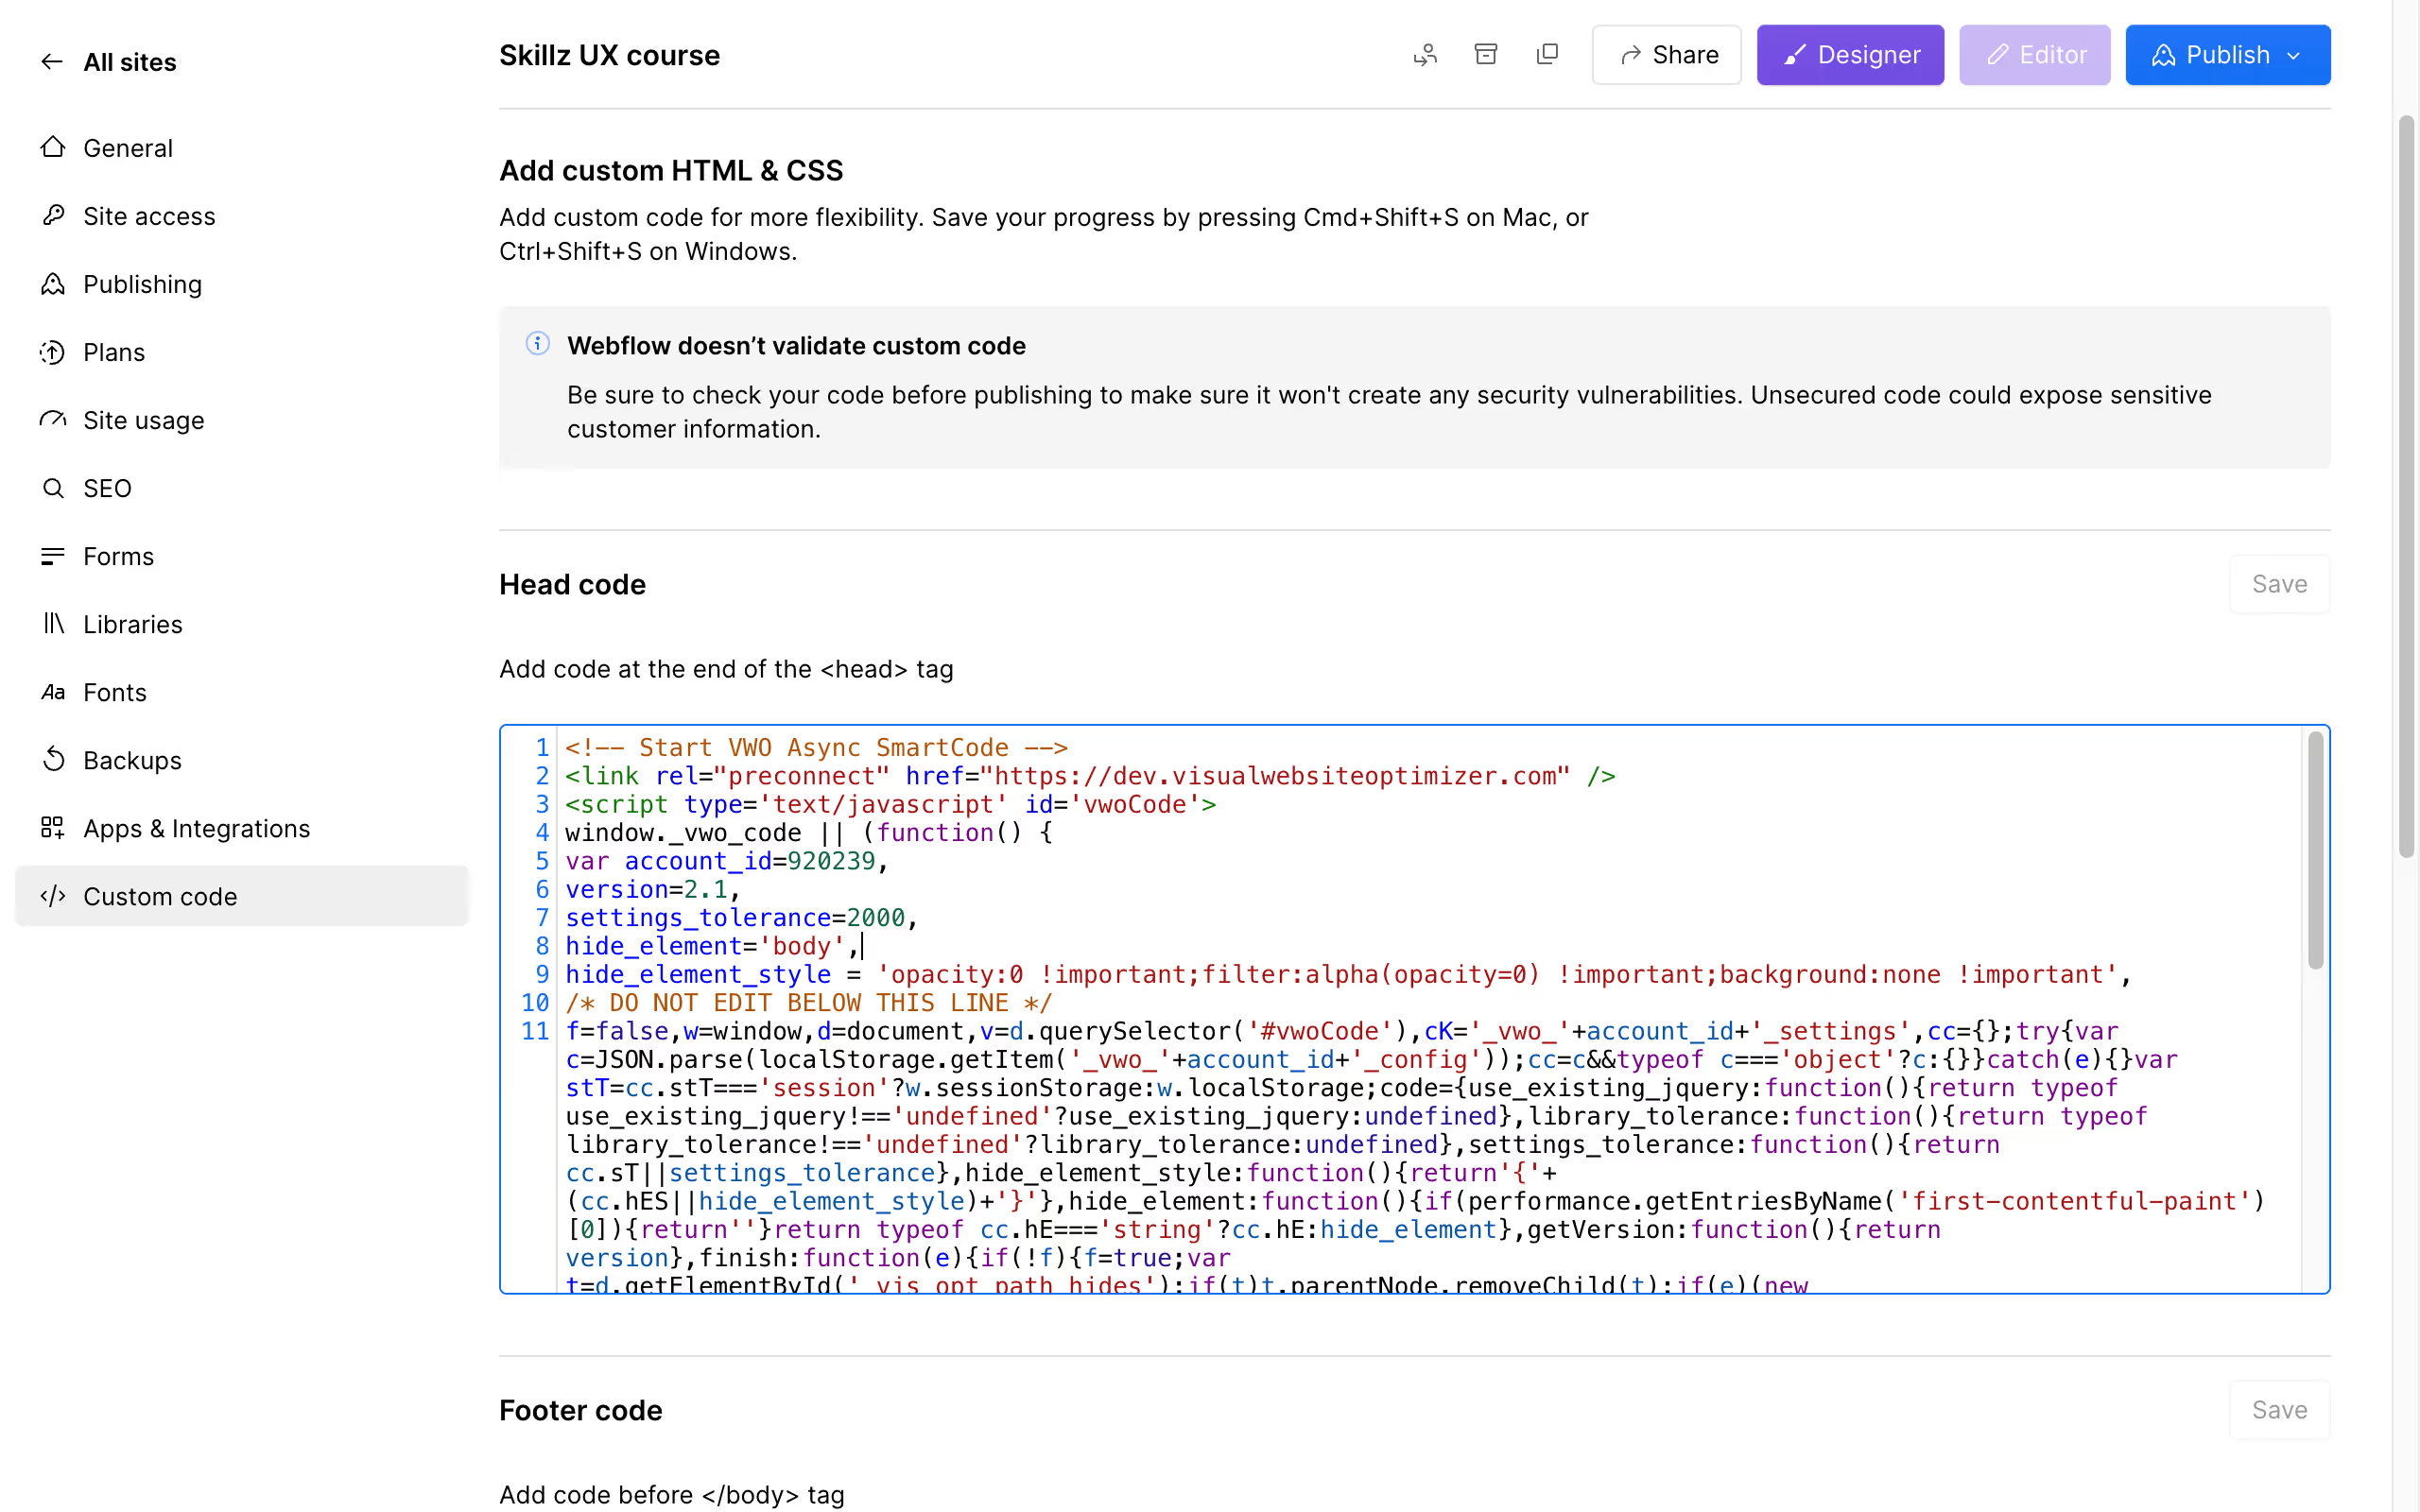
Paste the VWO tracking code snippet into the Head Code section.
Save changes and publish your site.
3. Test the integration: See if your code is properly implemented by adding the url at the test area and running the check.
Step 3: Create a New A/B Test
Now that VWO is connected with Webflow, we’ll move on to creating your first test.
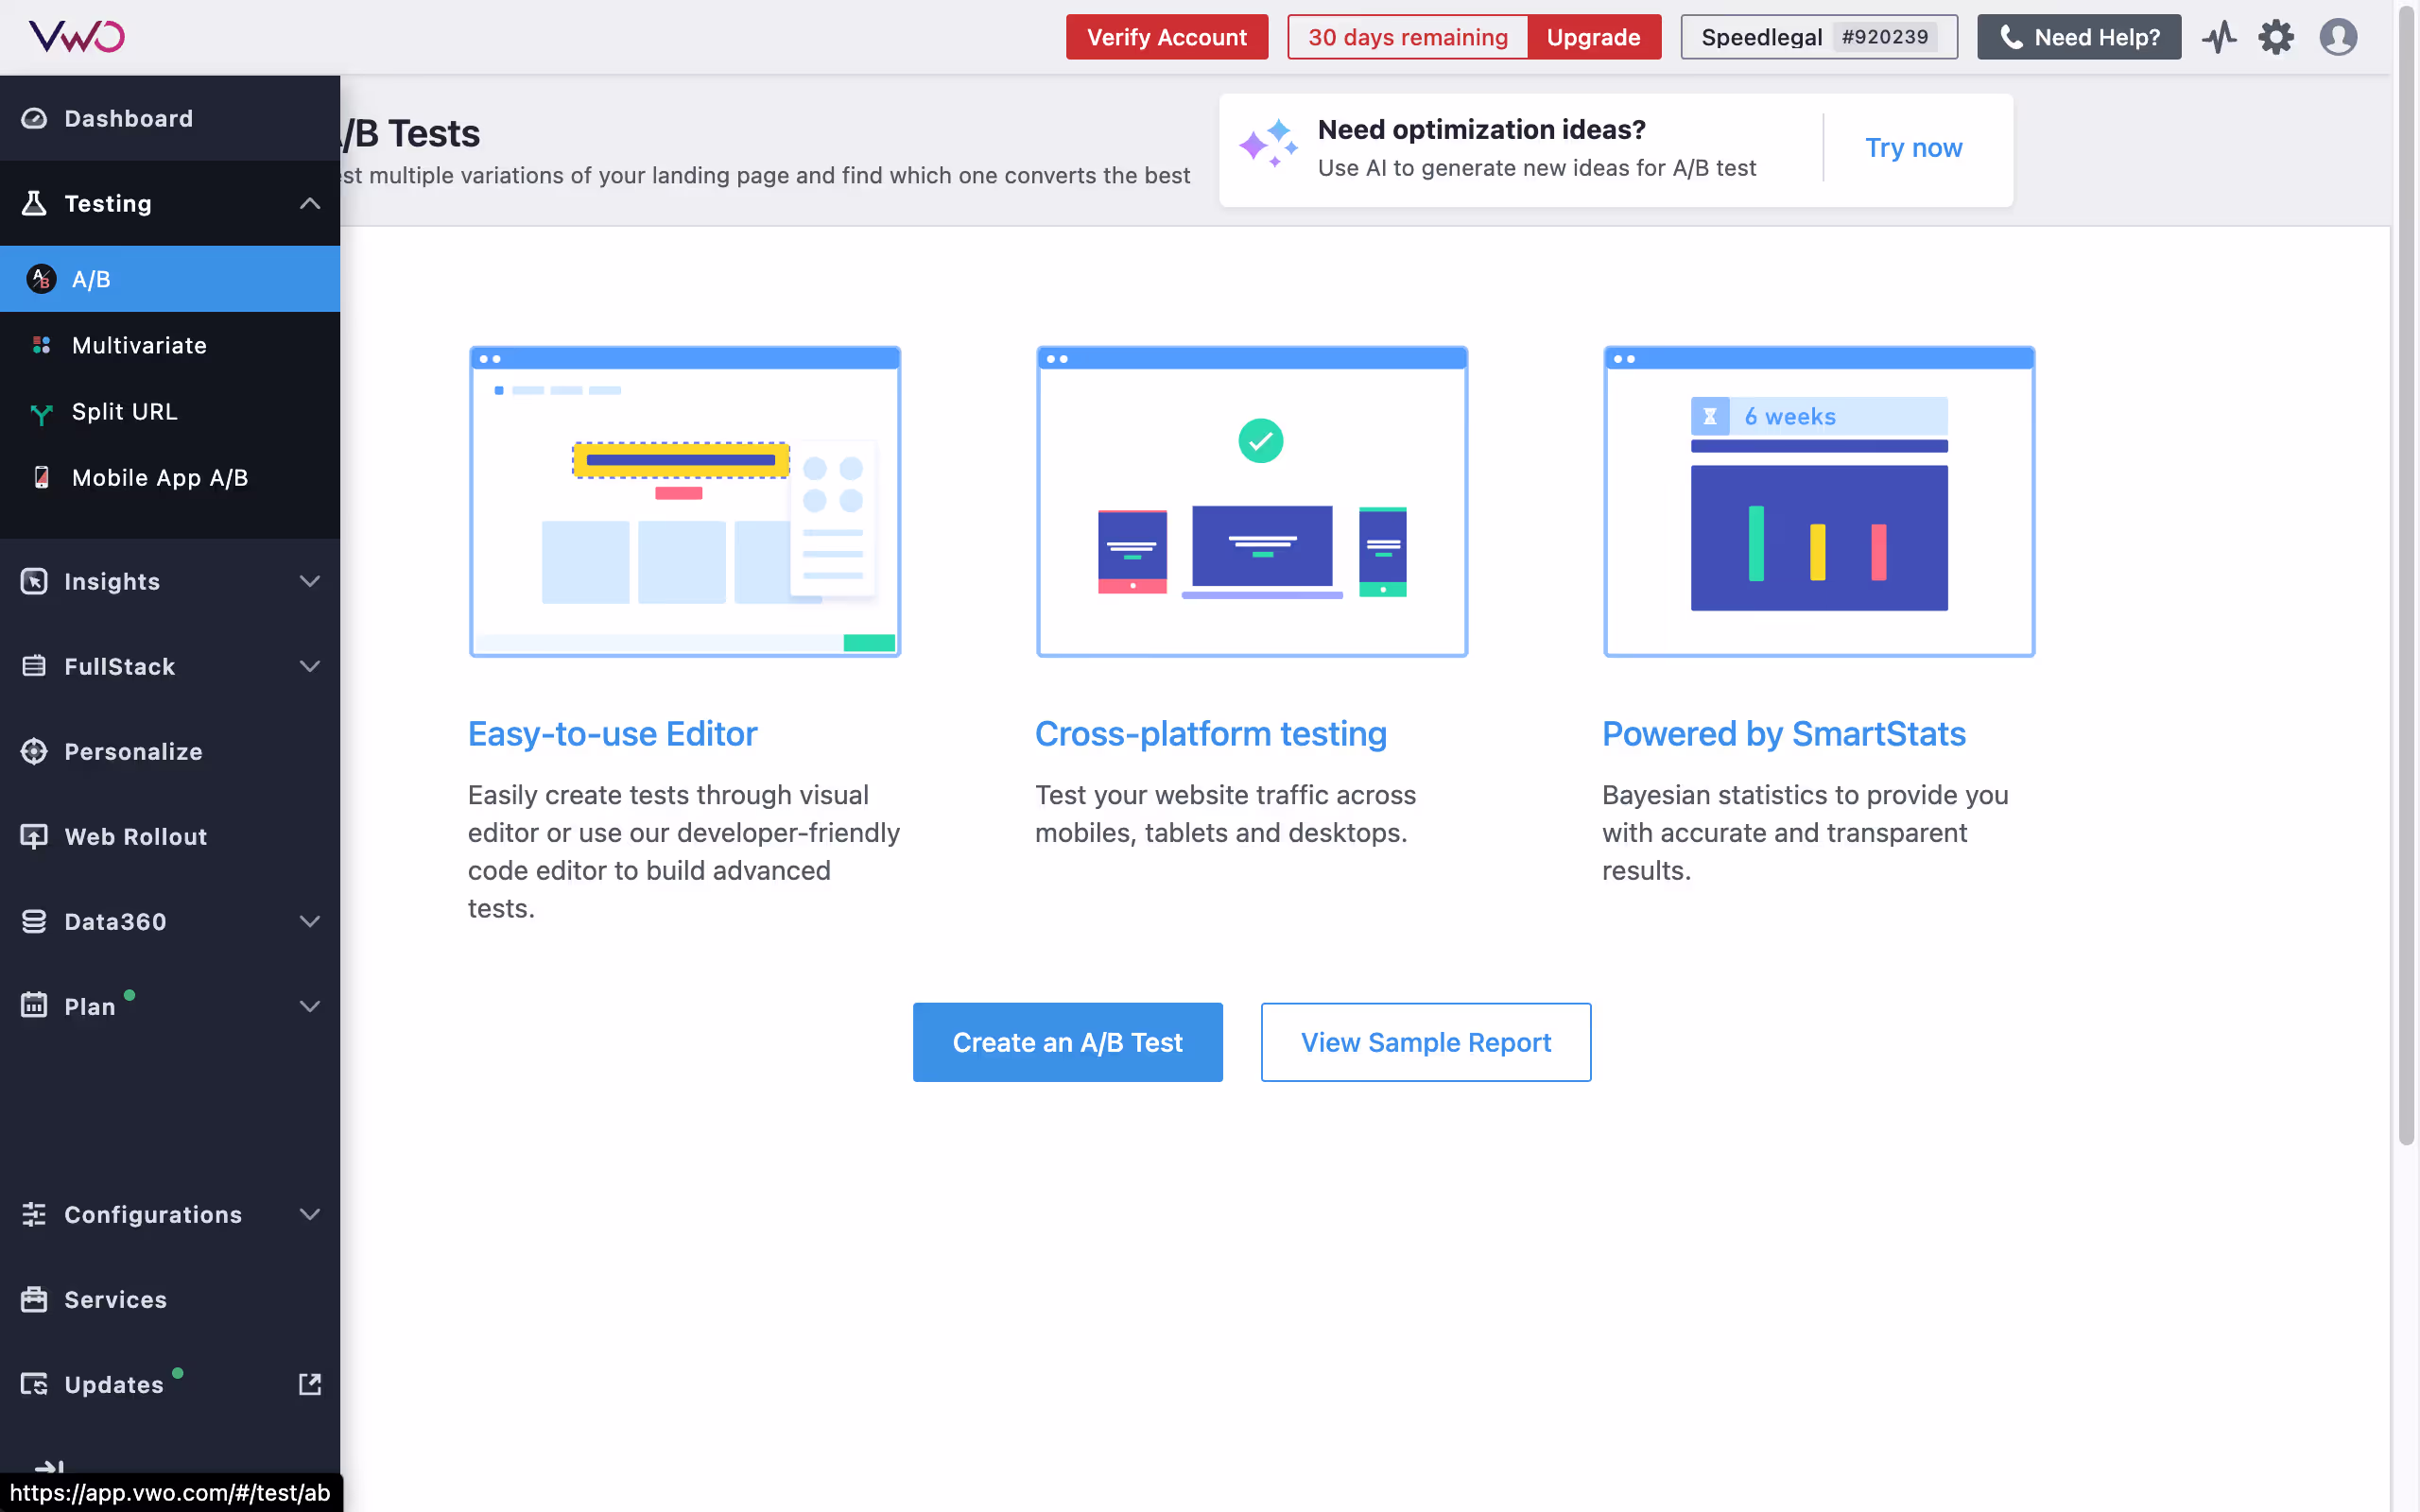
1. Start a New Test: In your VWO dashboard, click on 'Create' and select 'A/B Test' from the list of test types.
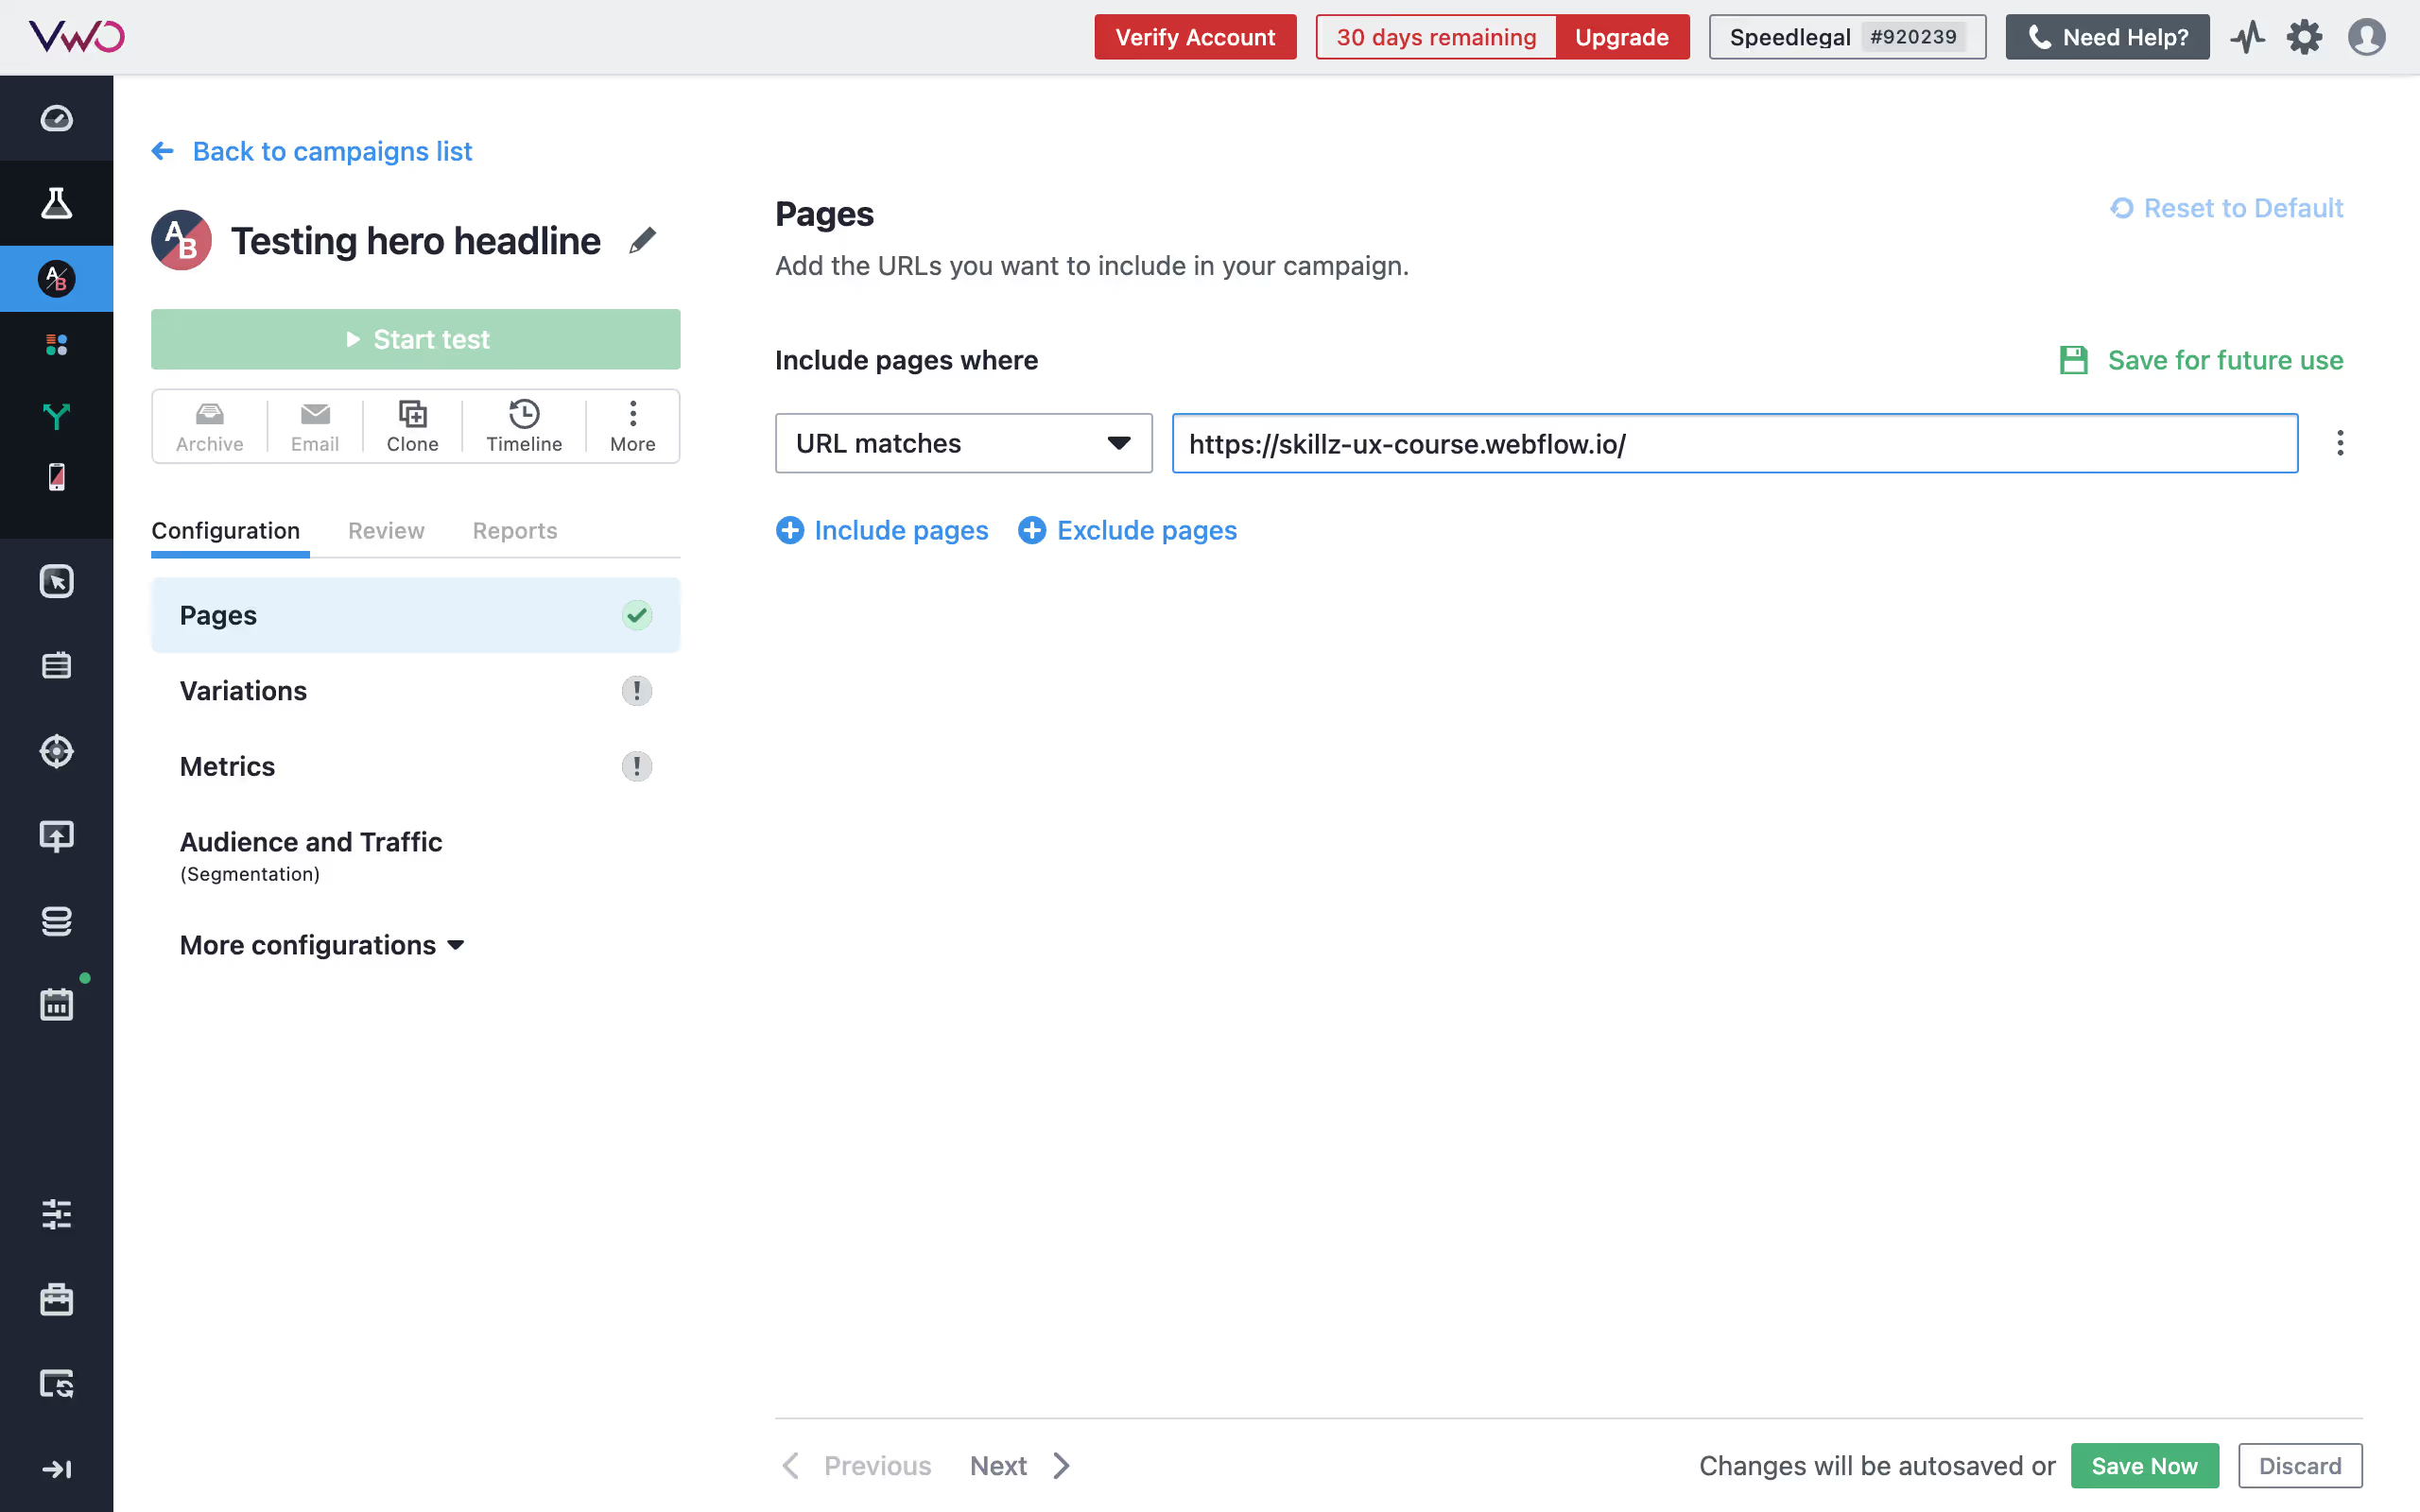
2. Define the Test URL: Enter the URL of the page where you want to test the hero headline. This will be your original version (Control version).
Step 4: Design Your Variations
Next, we’ll add the variation of your landing page with a different heading.
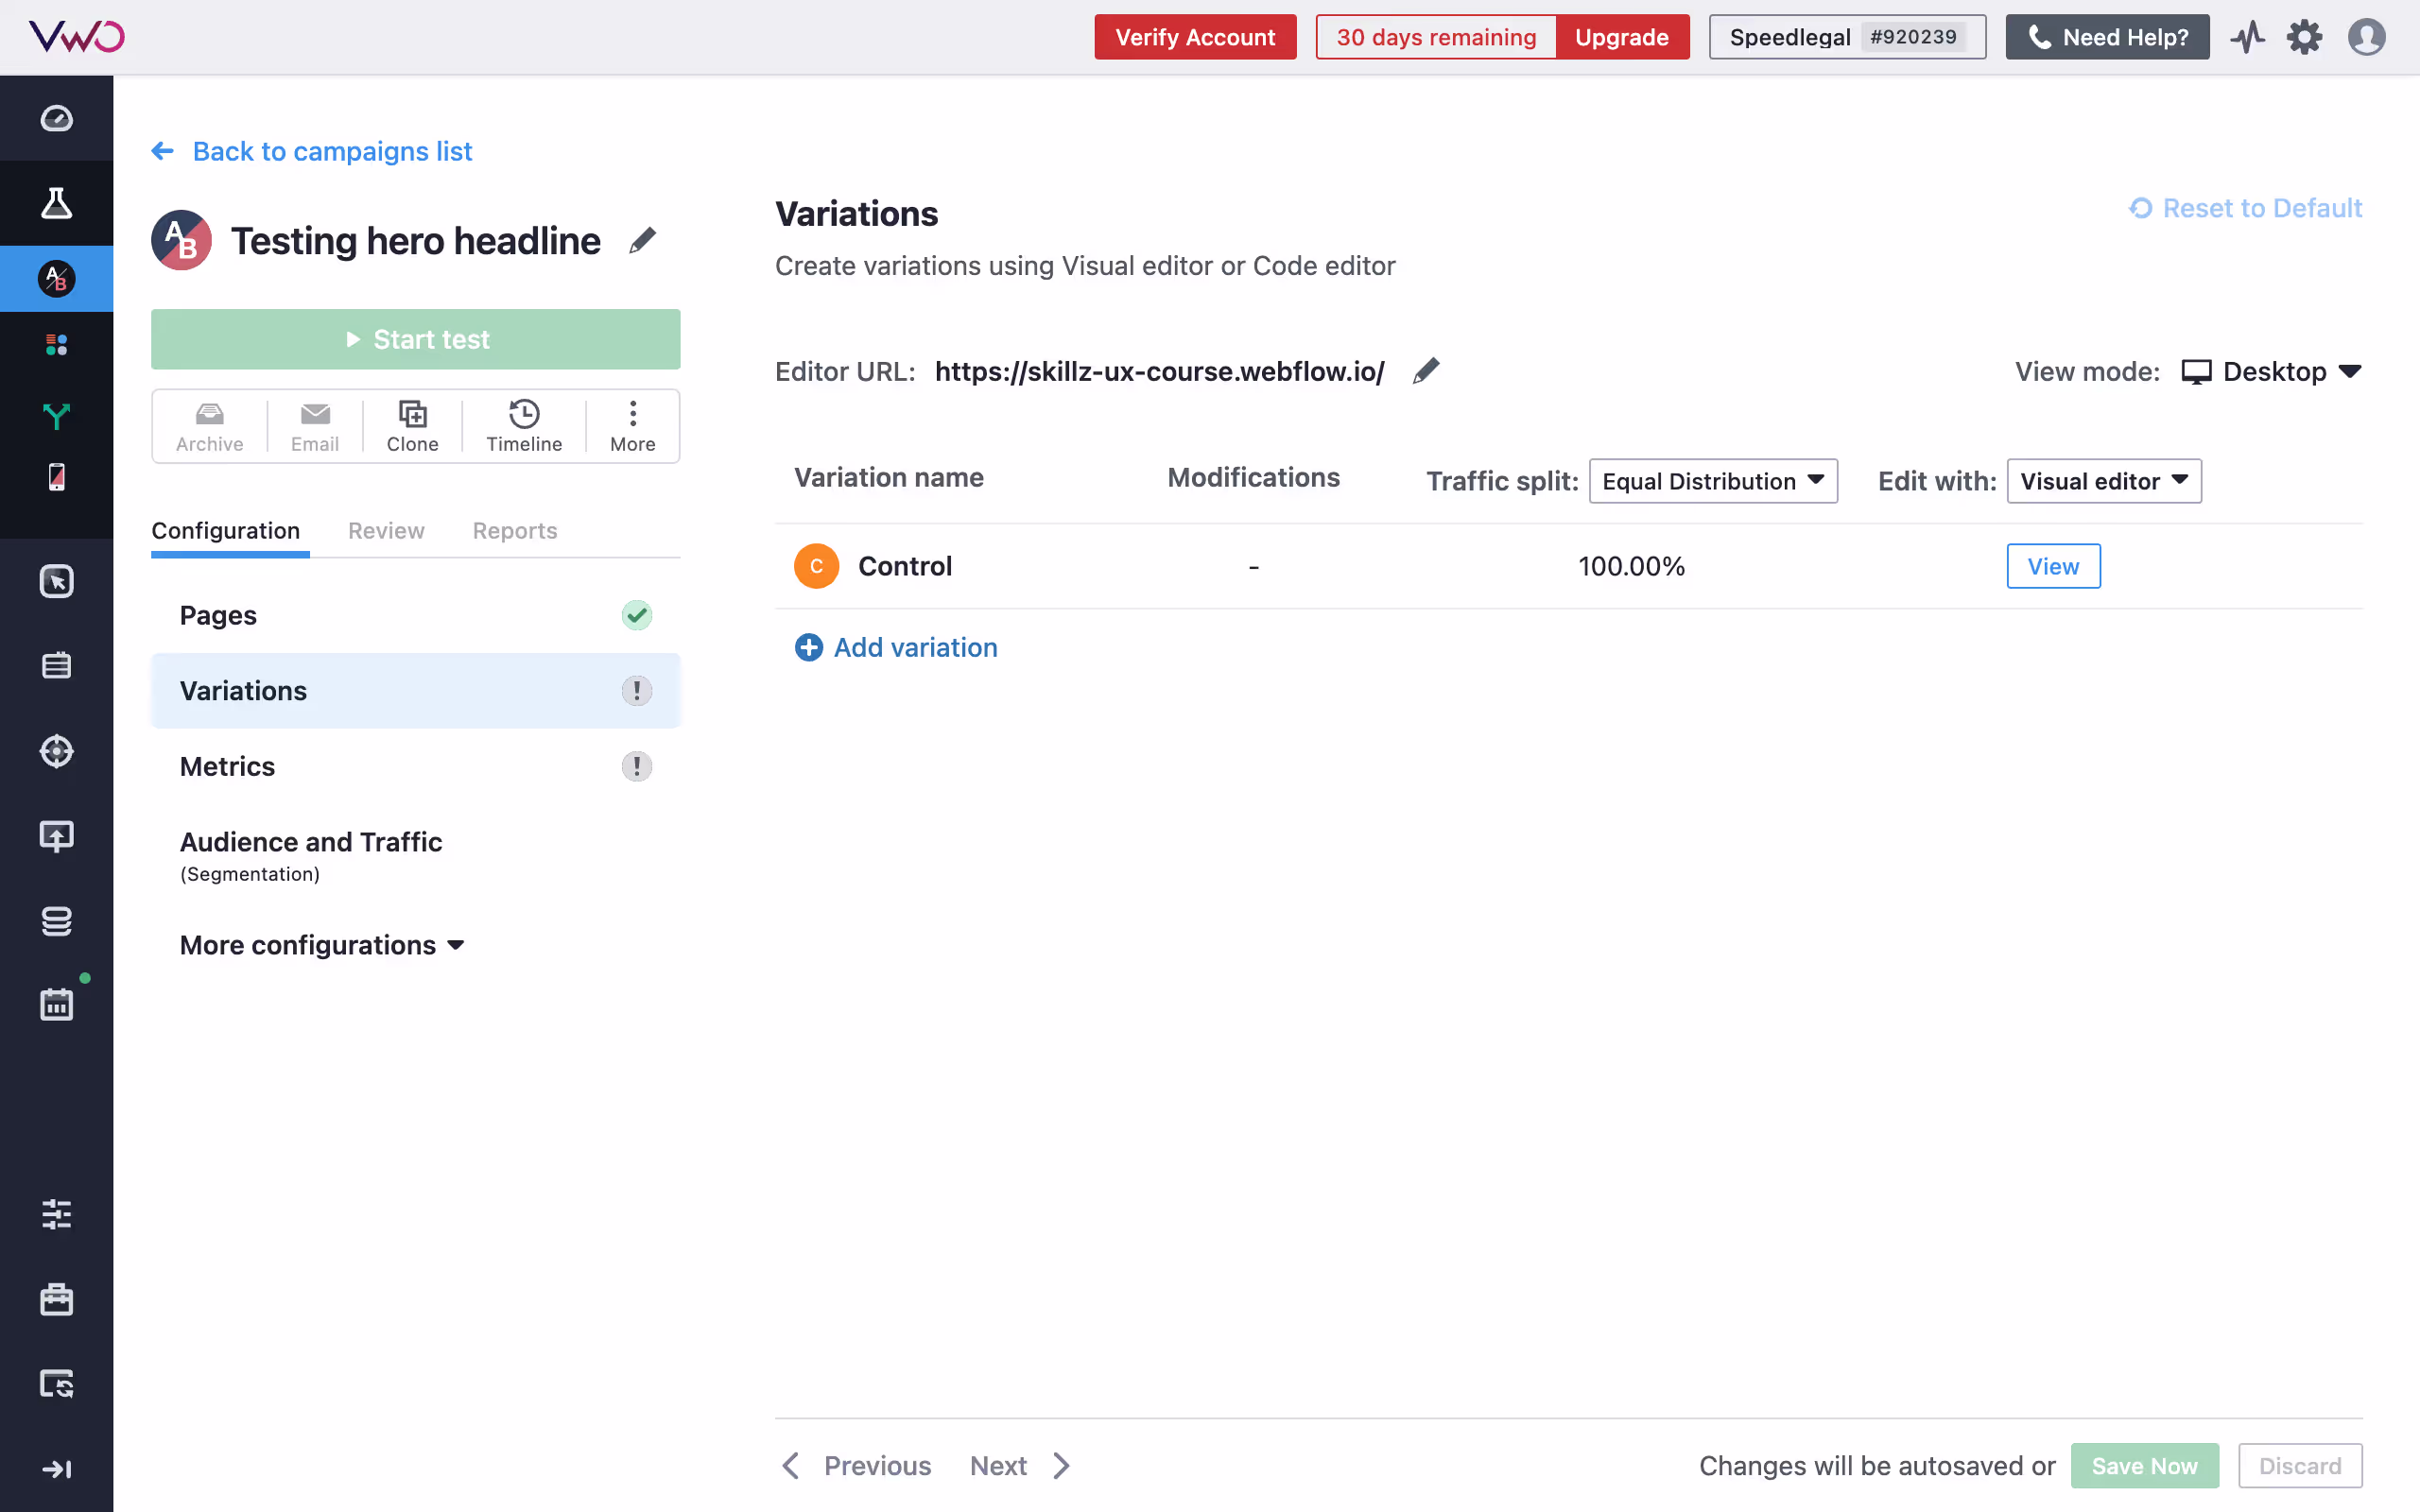
1. Add a variation: Now, go to variations under configurations, and click on ‘add variation’
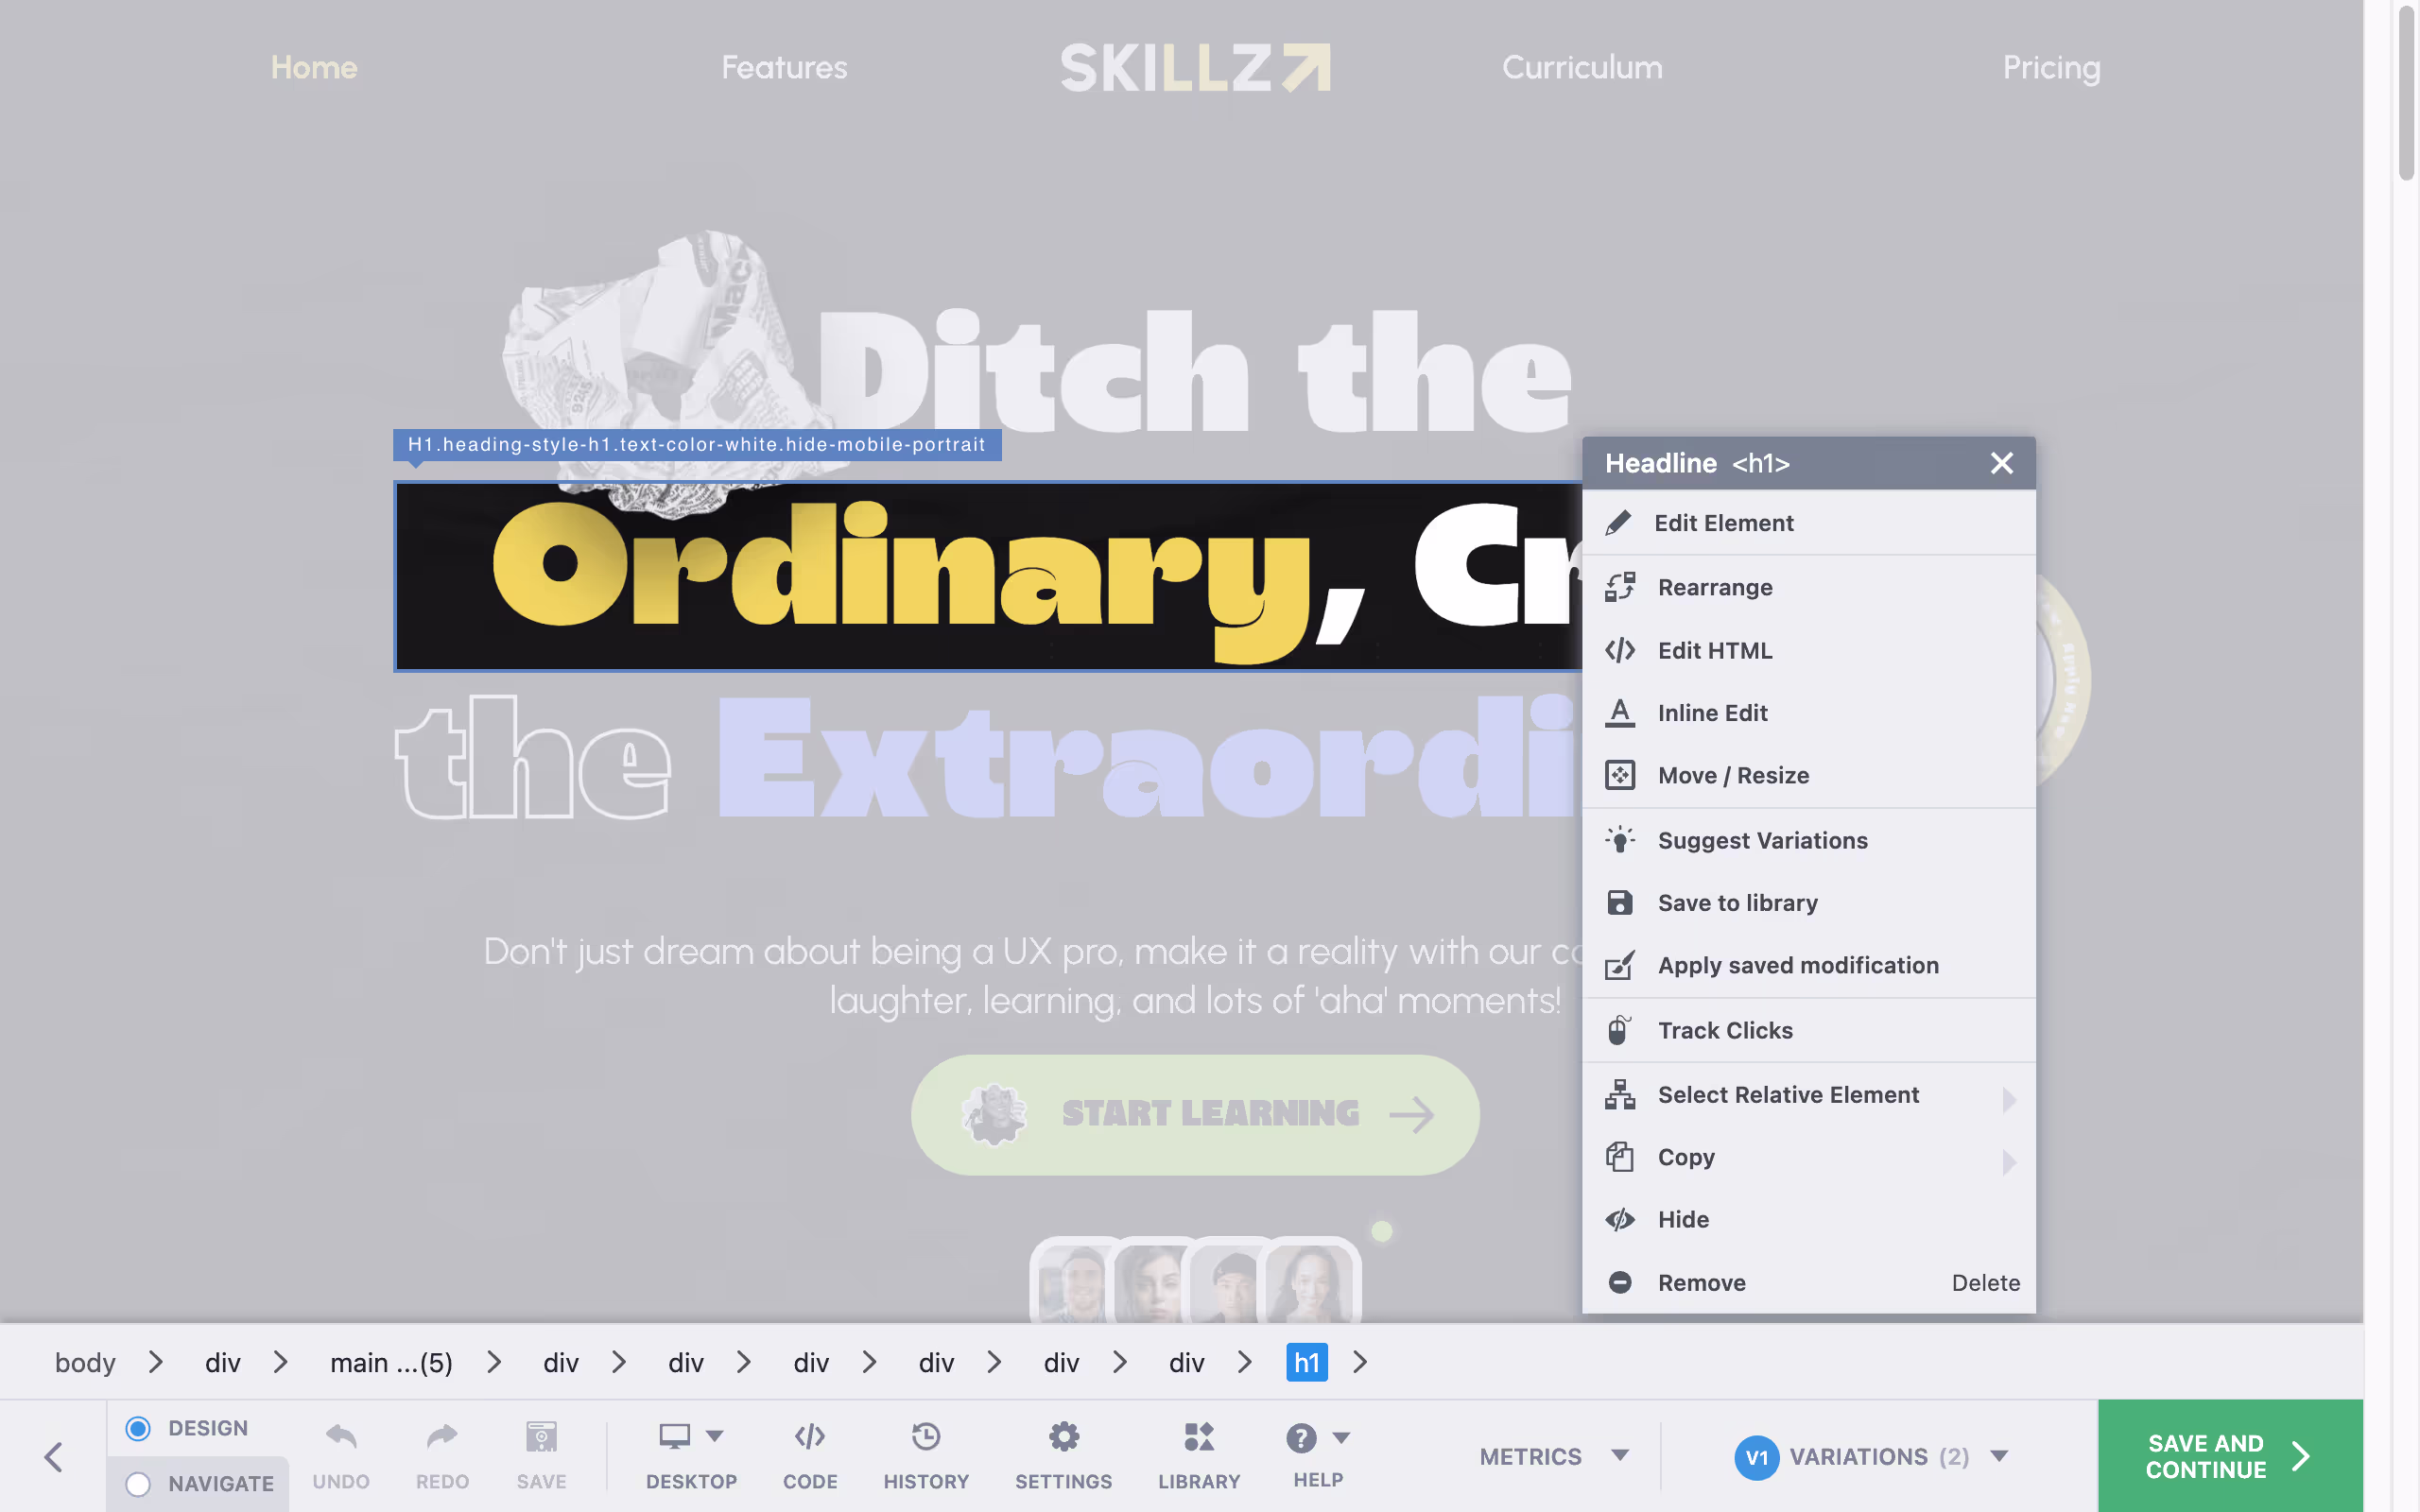
2. Editing Variation: Once done, click on ‘Edit’ to start editing your variation. This will open an editor where you can select and change the text like you’d normally do on Webflow. (You can also do a bunch of more things like rearrage text, add custom code, add or remove classes or change images, but we’ll keep the test simple for now.)
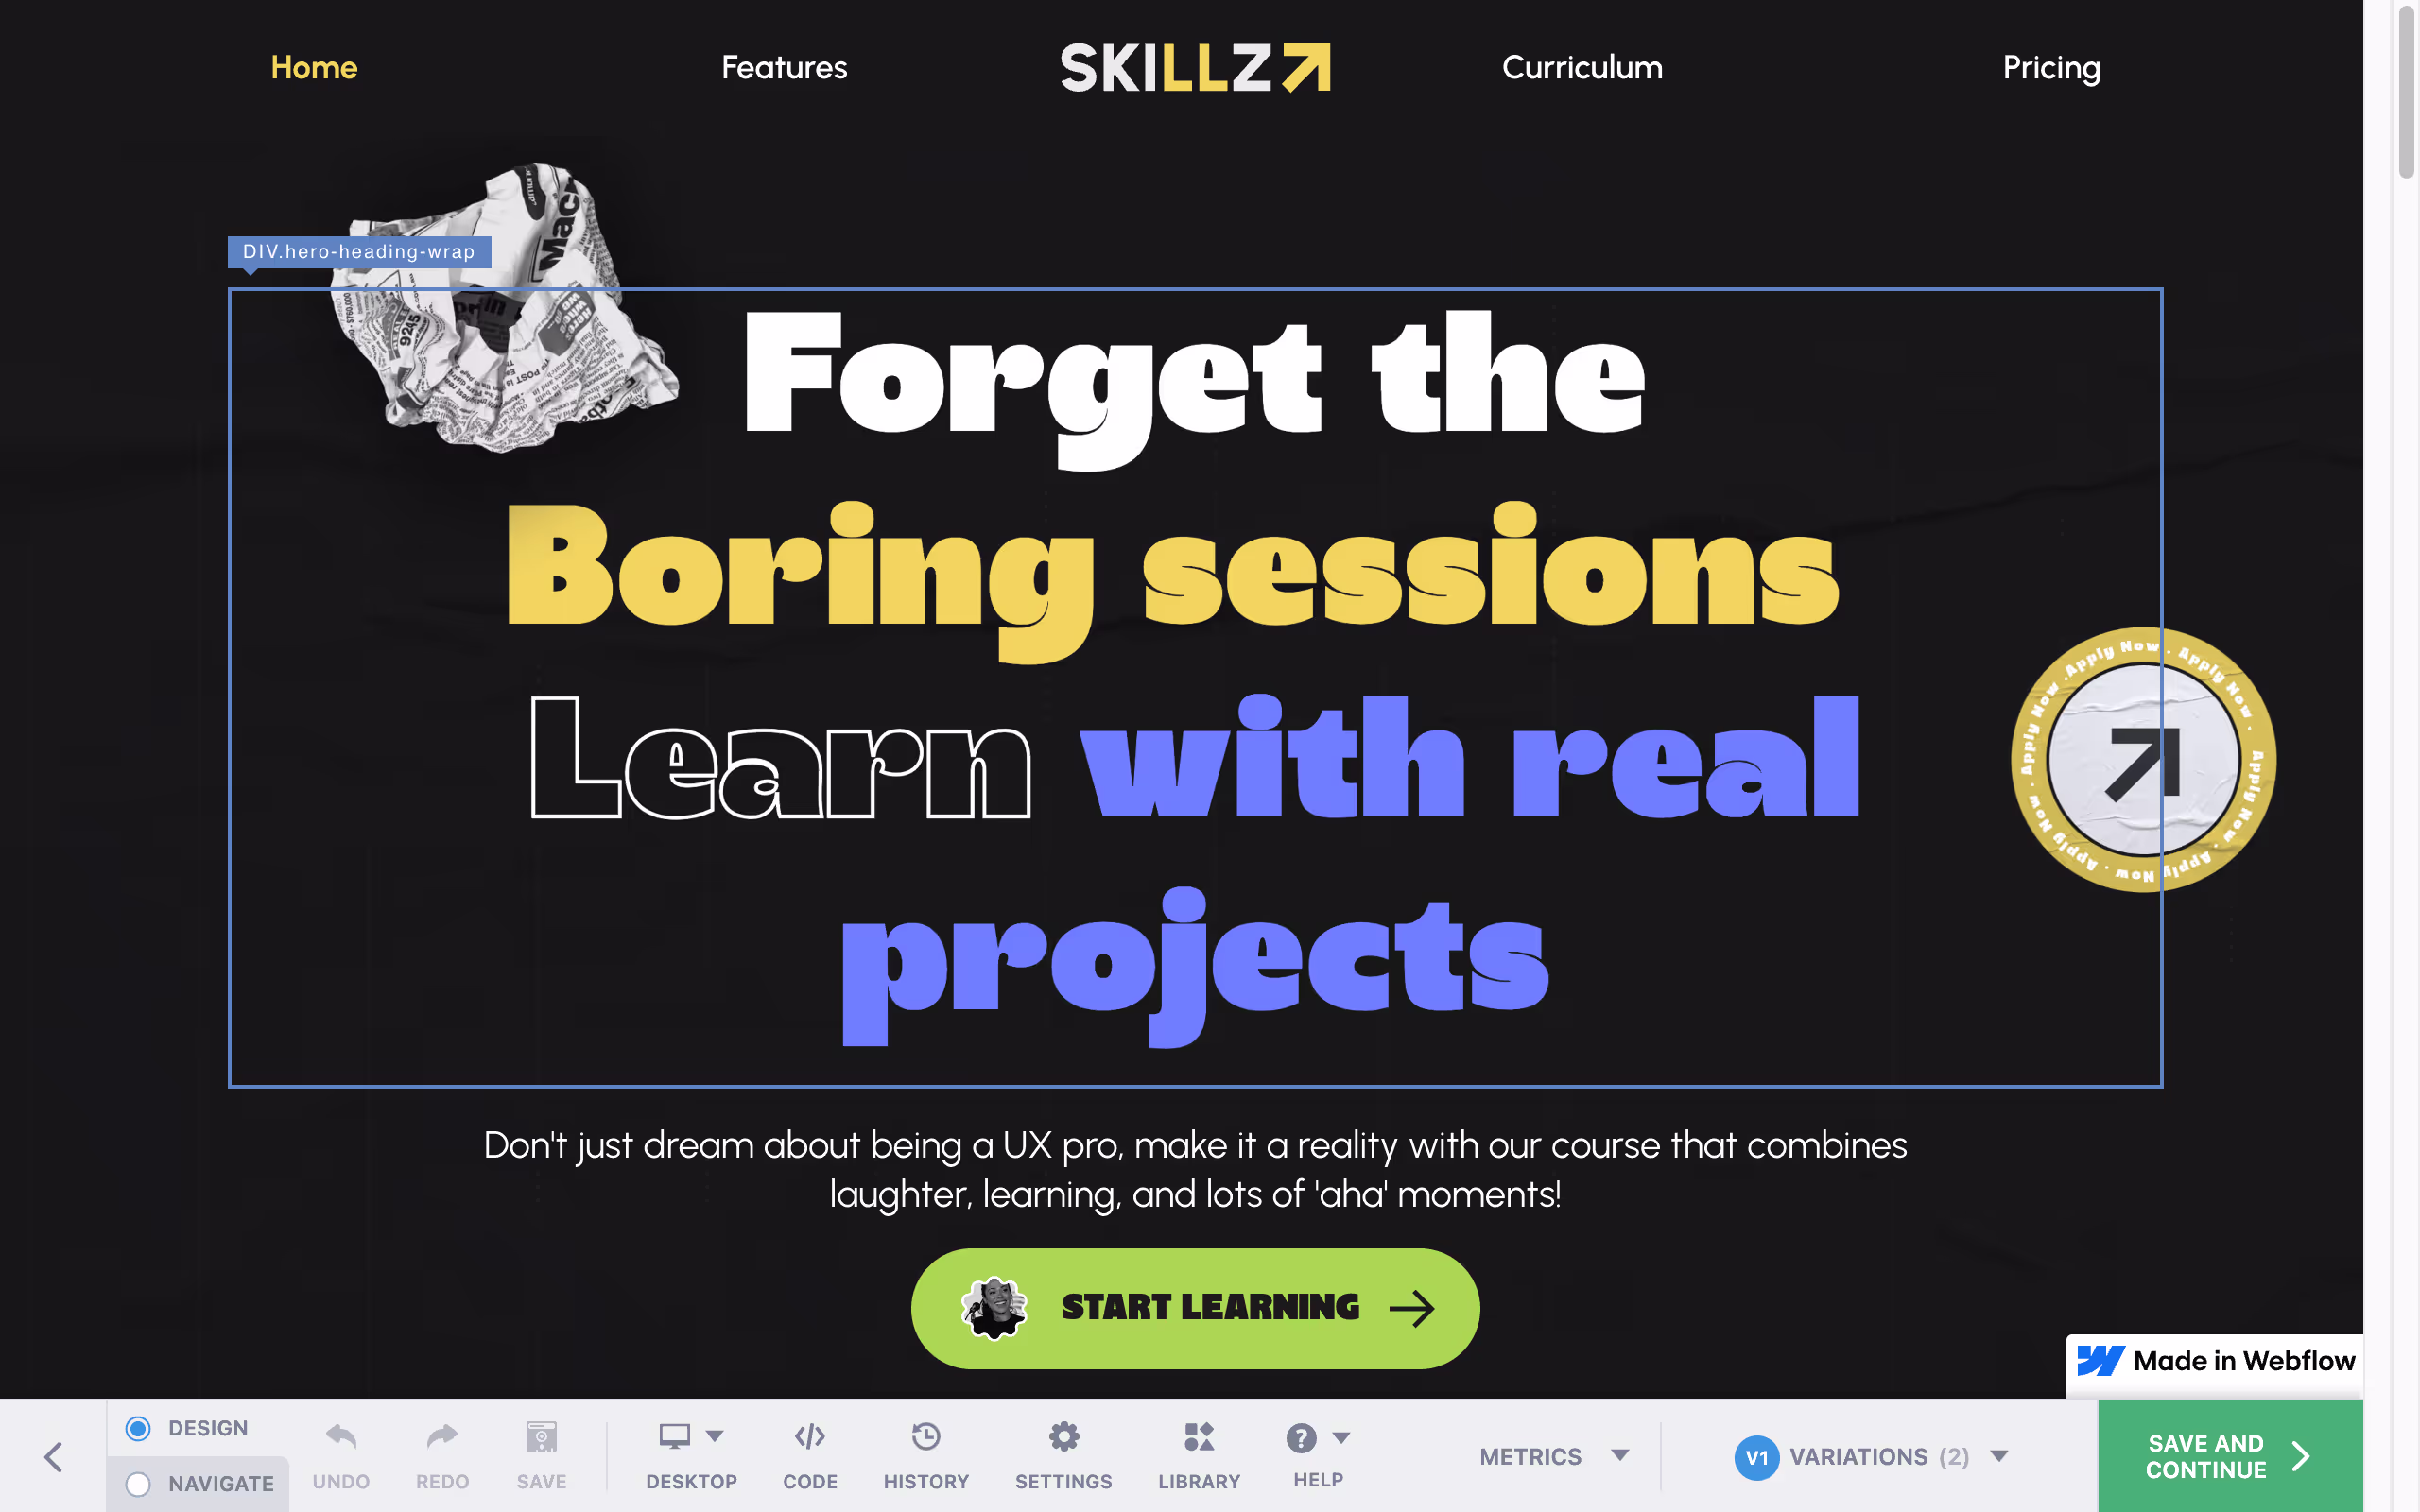
3. Preview and publish: Once you’ve edited the headline, preview how it looks on smaller devices, and once you are satisfies, hit ‘save and continue’.
Step 5: Set Goals for Your Test
Now that you have your variations ready, we’ll define what metrics we want to test.
1. Define Your Objectives: Set clear goals for your A/B test. For this example, We’ll set form submission as one of the KPIs
Step 6: Target Your Audience
1. Segment Your Audience:With VWO, you can create custom segments of your audience that you want to target. This could be based on location, devices or other user behaviours. For this test, we’ll target all visitors.
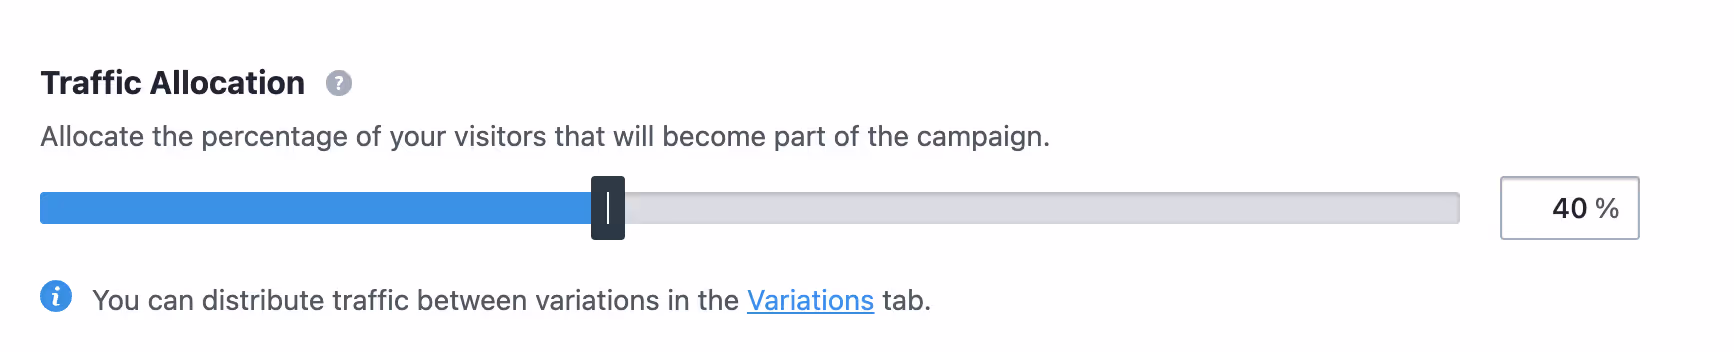
2. Set Traffic Allocation: You can decide how much of your traffic should be a part of this test. for example if you get 1000 users a day, and you only want to run this test 400 of them, you can set this bar to 40%
Step 7: Run the Test
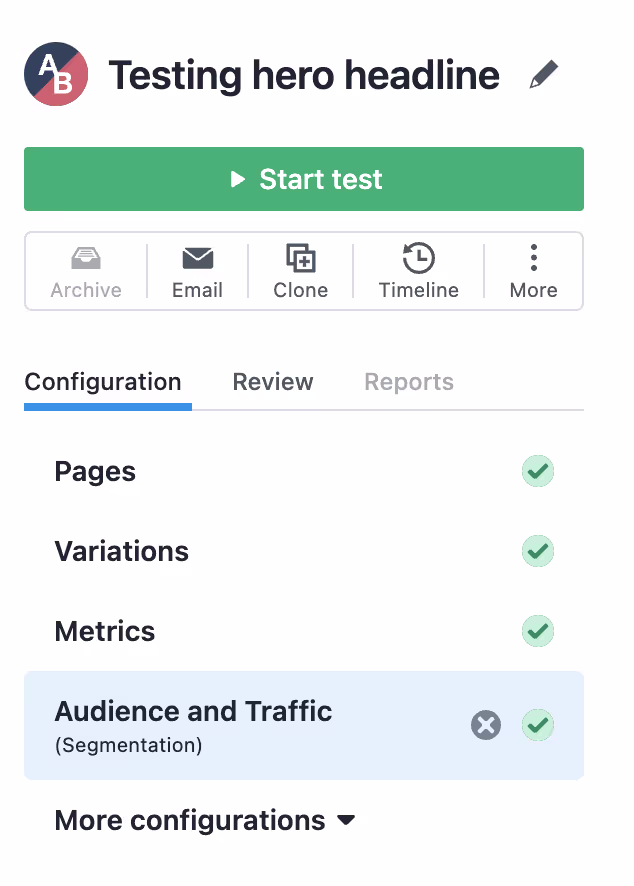
1. Start the Test: Once you’ve reviewed all your changes and are satisfid with it, click on 'Start Test' to begin. VWO will then start showing the different variations to your visitors and collecting data on their interactions.
2. Monitor the Test: Congrats! You’ve successfully created your first test. Now keep an eye on your test as it runs.
Step 8: Analyze the Results
Give your test adequate time to run, and once that’s done, you can review the results to see which headline worked better.
Review Performance Metrics: VWO will provide detailed reports on conversion rates, engagement metrics, and other key performance indicators for each variation.
Determine the Winner: Based on this data, you can determine which headline performed better and met your goals.
Implement the winning variation: If Version B significantly outperformed Version A, implement those changes on your live site.
Now that you are familiar with using VWO for your A/B tests, let’s see how you can setup the same A/B test using Optibase.
Step-by-Step Guide to A/B Testing (with Optibase)
Optibase provides two options for setting up A/B tests on your Webflow site: using the Webflow App or manual setup. In this guide, we'll focus on the Webflow App method since its faster to both implement and experiment. We’ll use the same example as before to keep things simple.
Step 1: Sign Up and Create an Account
1. Visit the Optibase Website: Go to the Optibase website and sign up for an account. If you already have an account, log in.
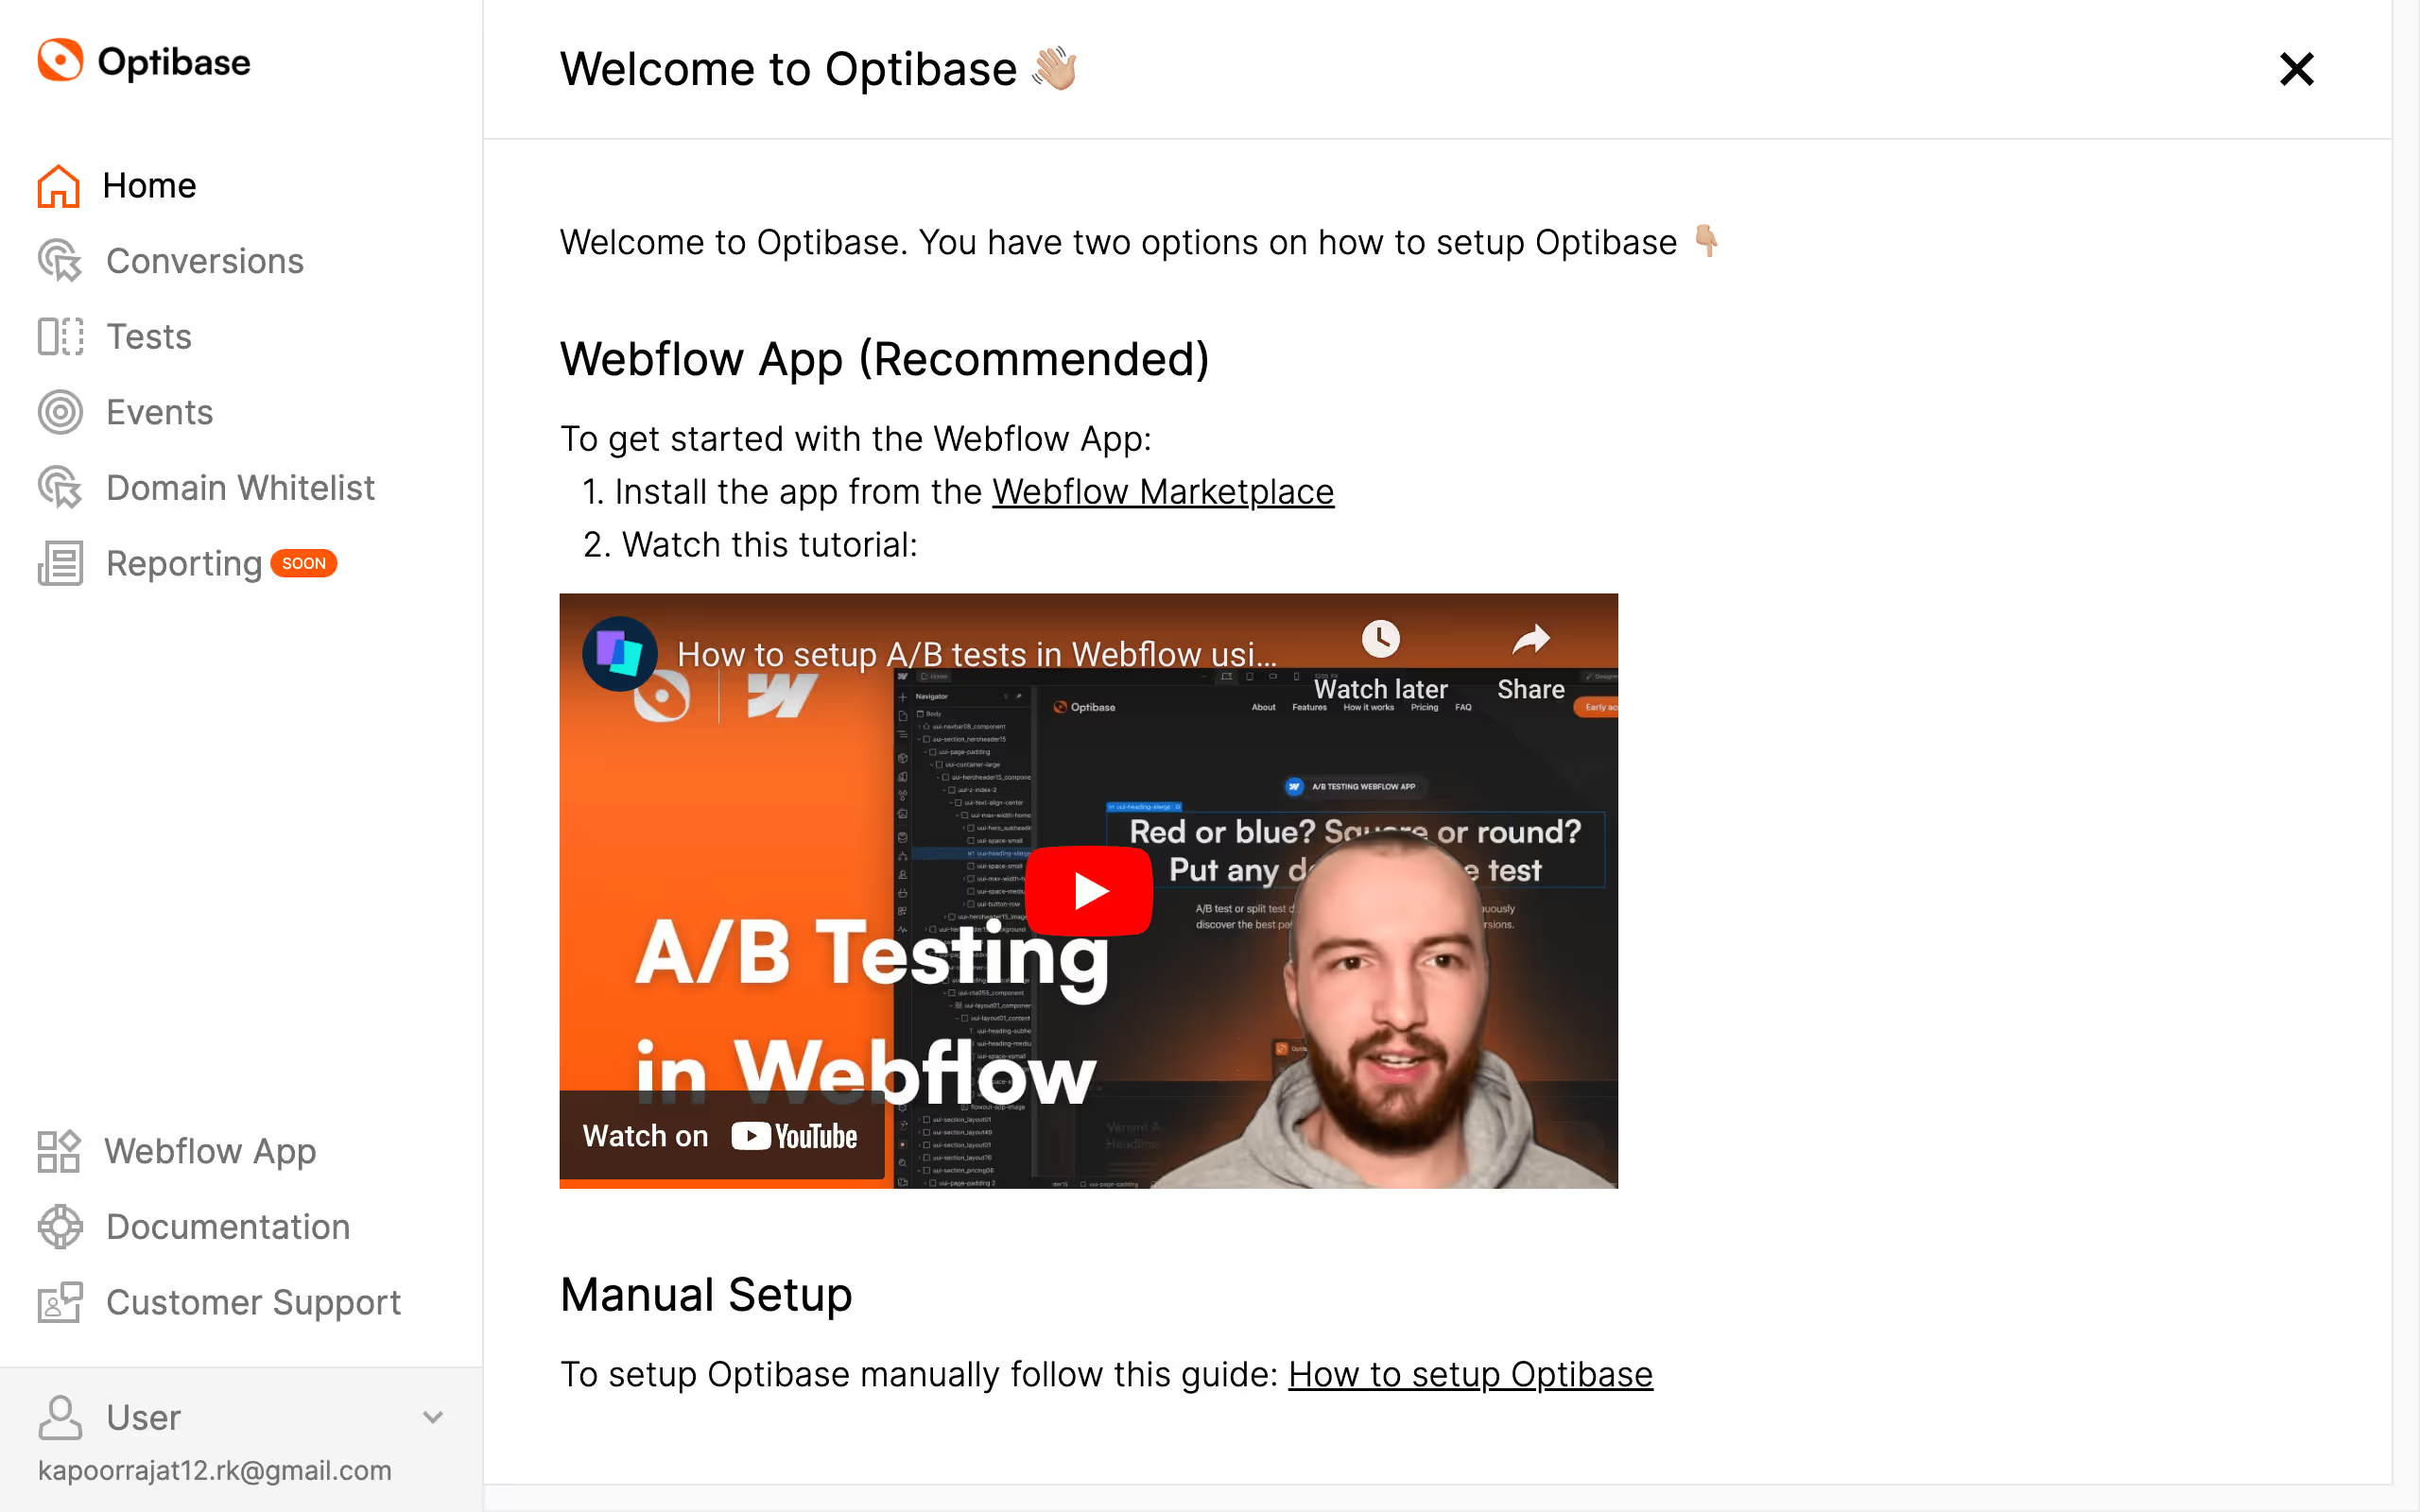
2. Setup Optibase: Once logged in, you’ll see 2 options to set it up - Using Webflow App, or manual setup. We’ll go with the Webflow App method.
Step 2: Install the Optibase App from the Webflow Marketplace
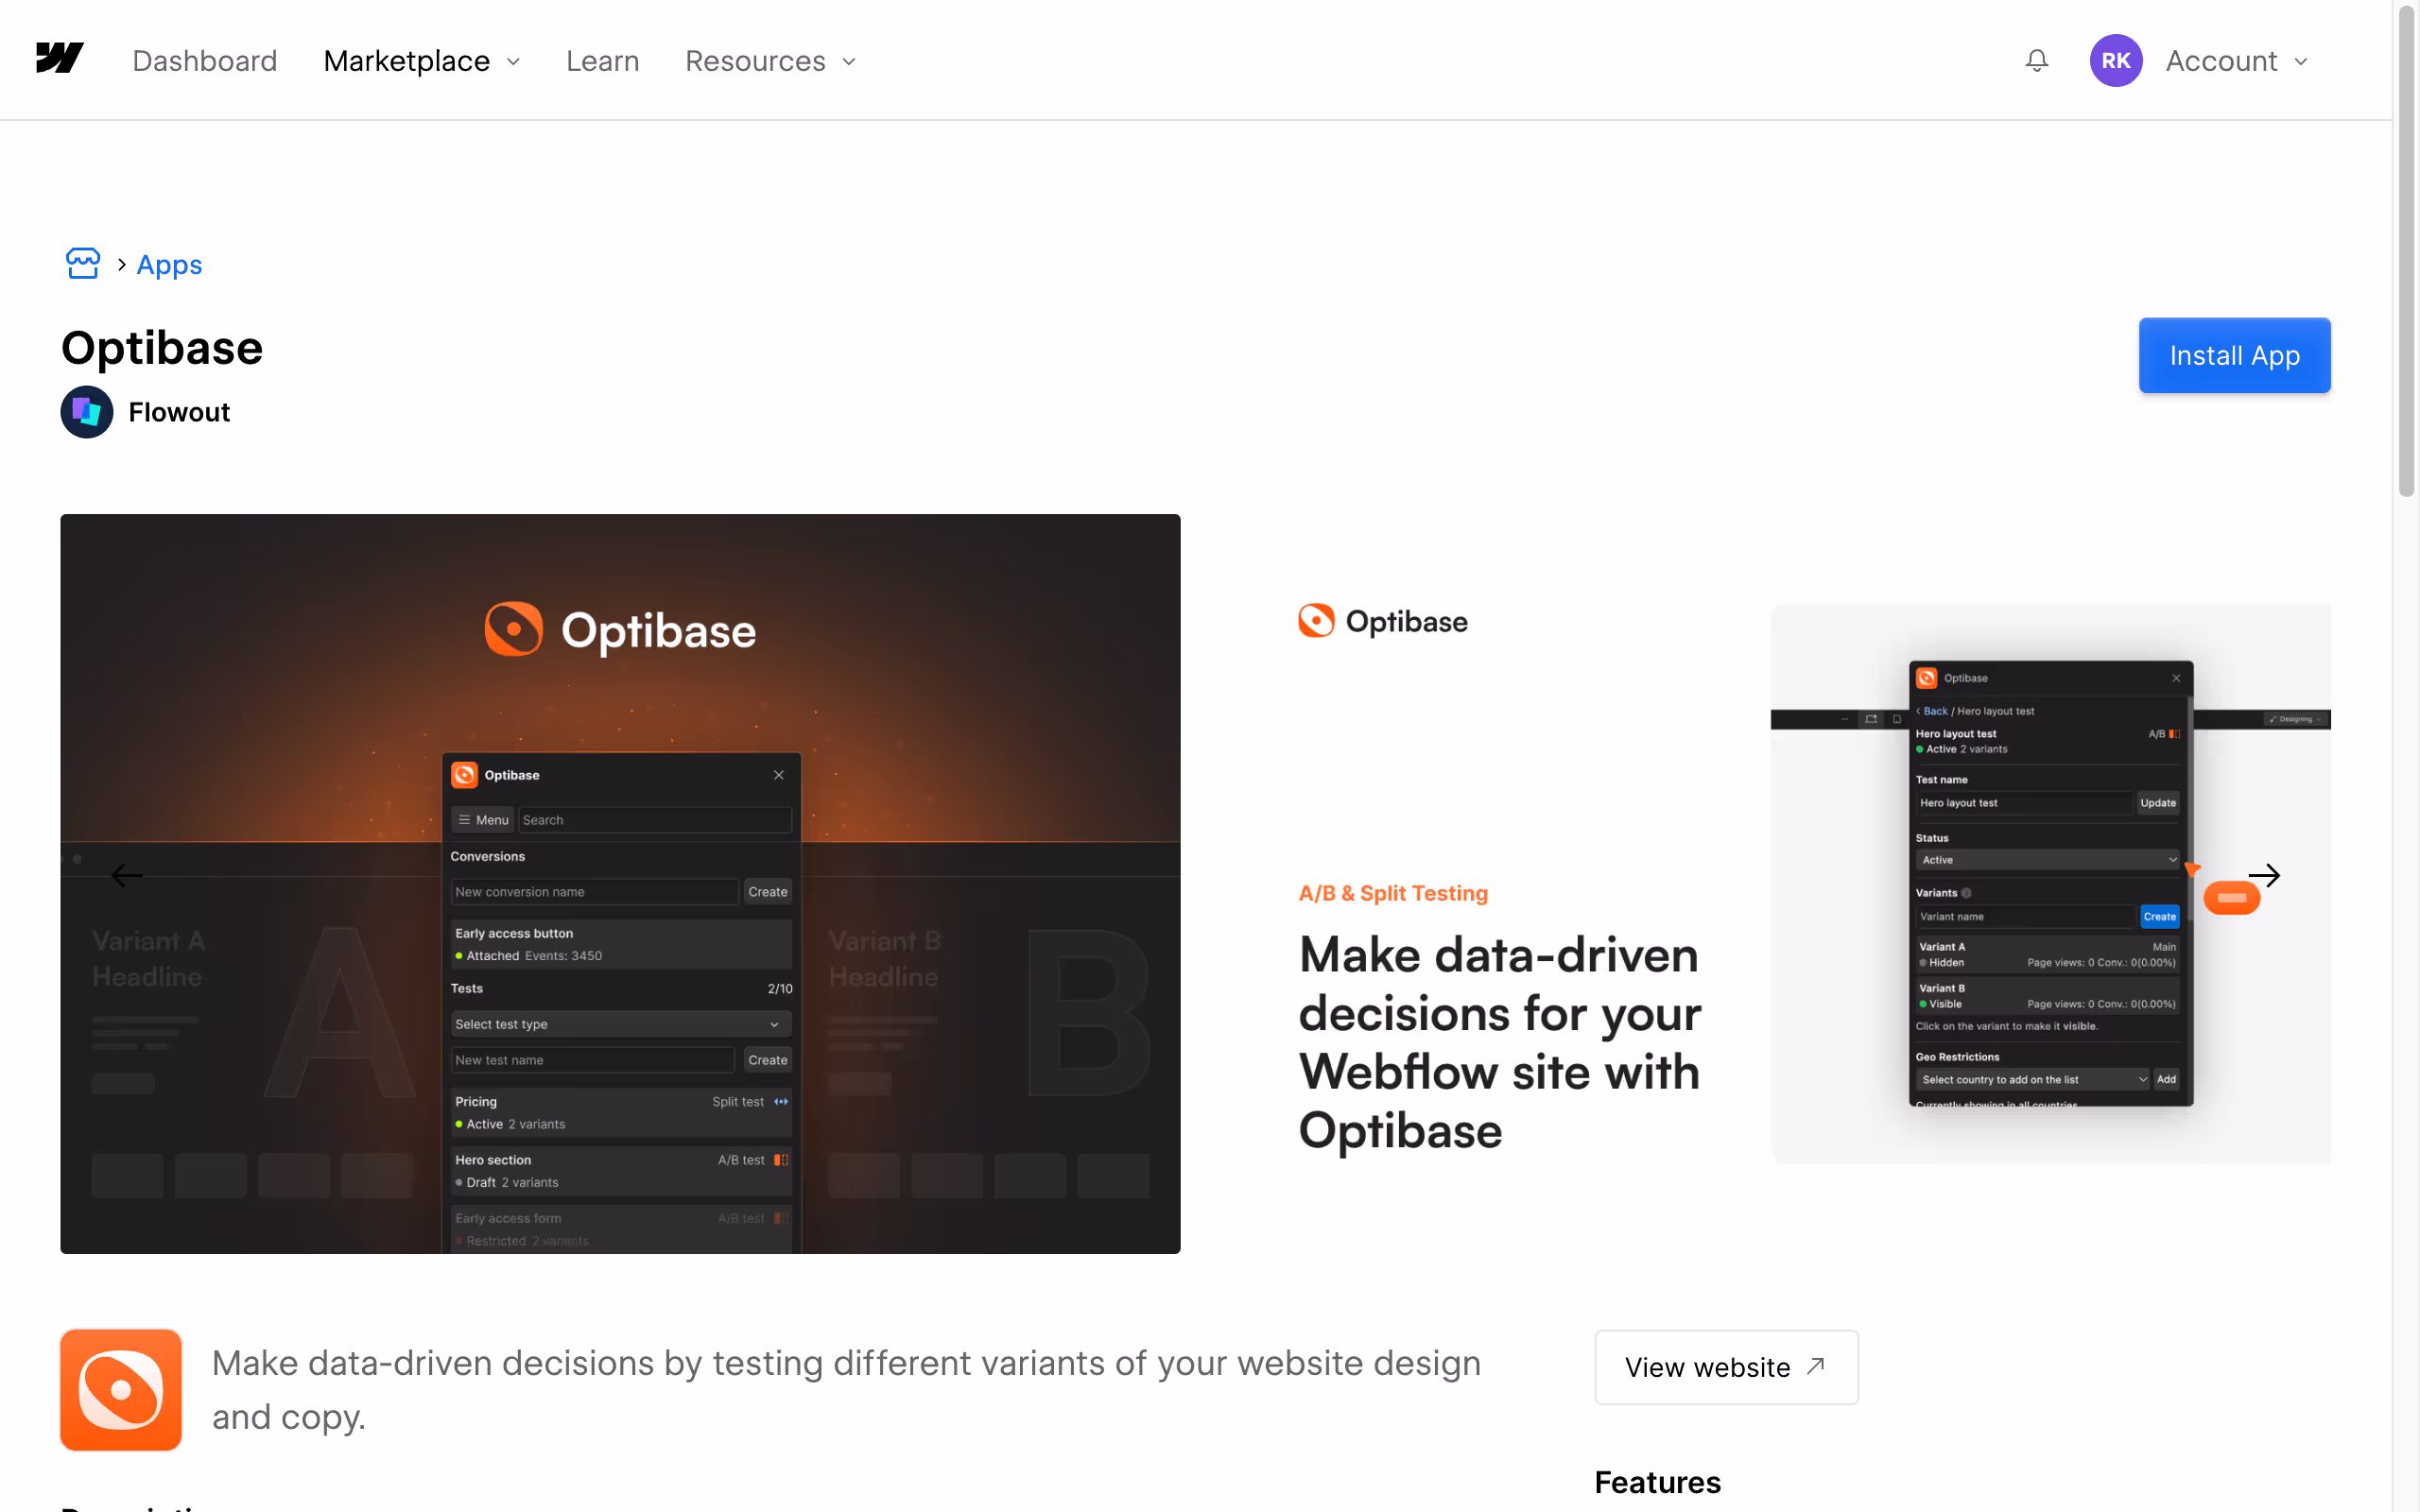
1. Go to Webflow Marketplace: Click the Webflow Marketplace link from the app, or manually search for Optibase in the Webflow marketplace, and click on ‘Install App’.
2. Install the App: Select the website you want to connect it with, and authorize it.
Step 3: Connect Optibase to Your Webflow Site
Now that the app is installed, we’ll need to connect Optibase to the site as well
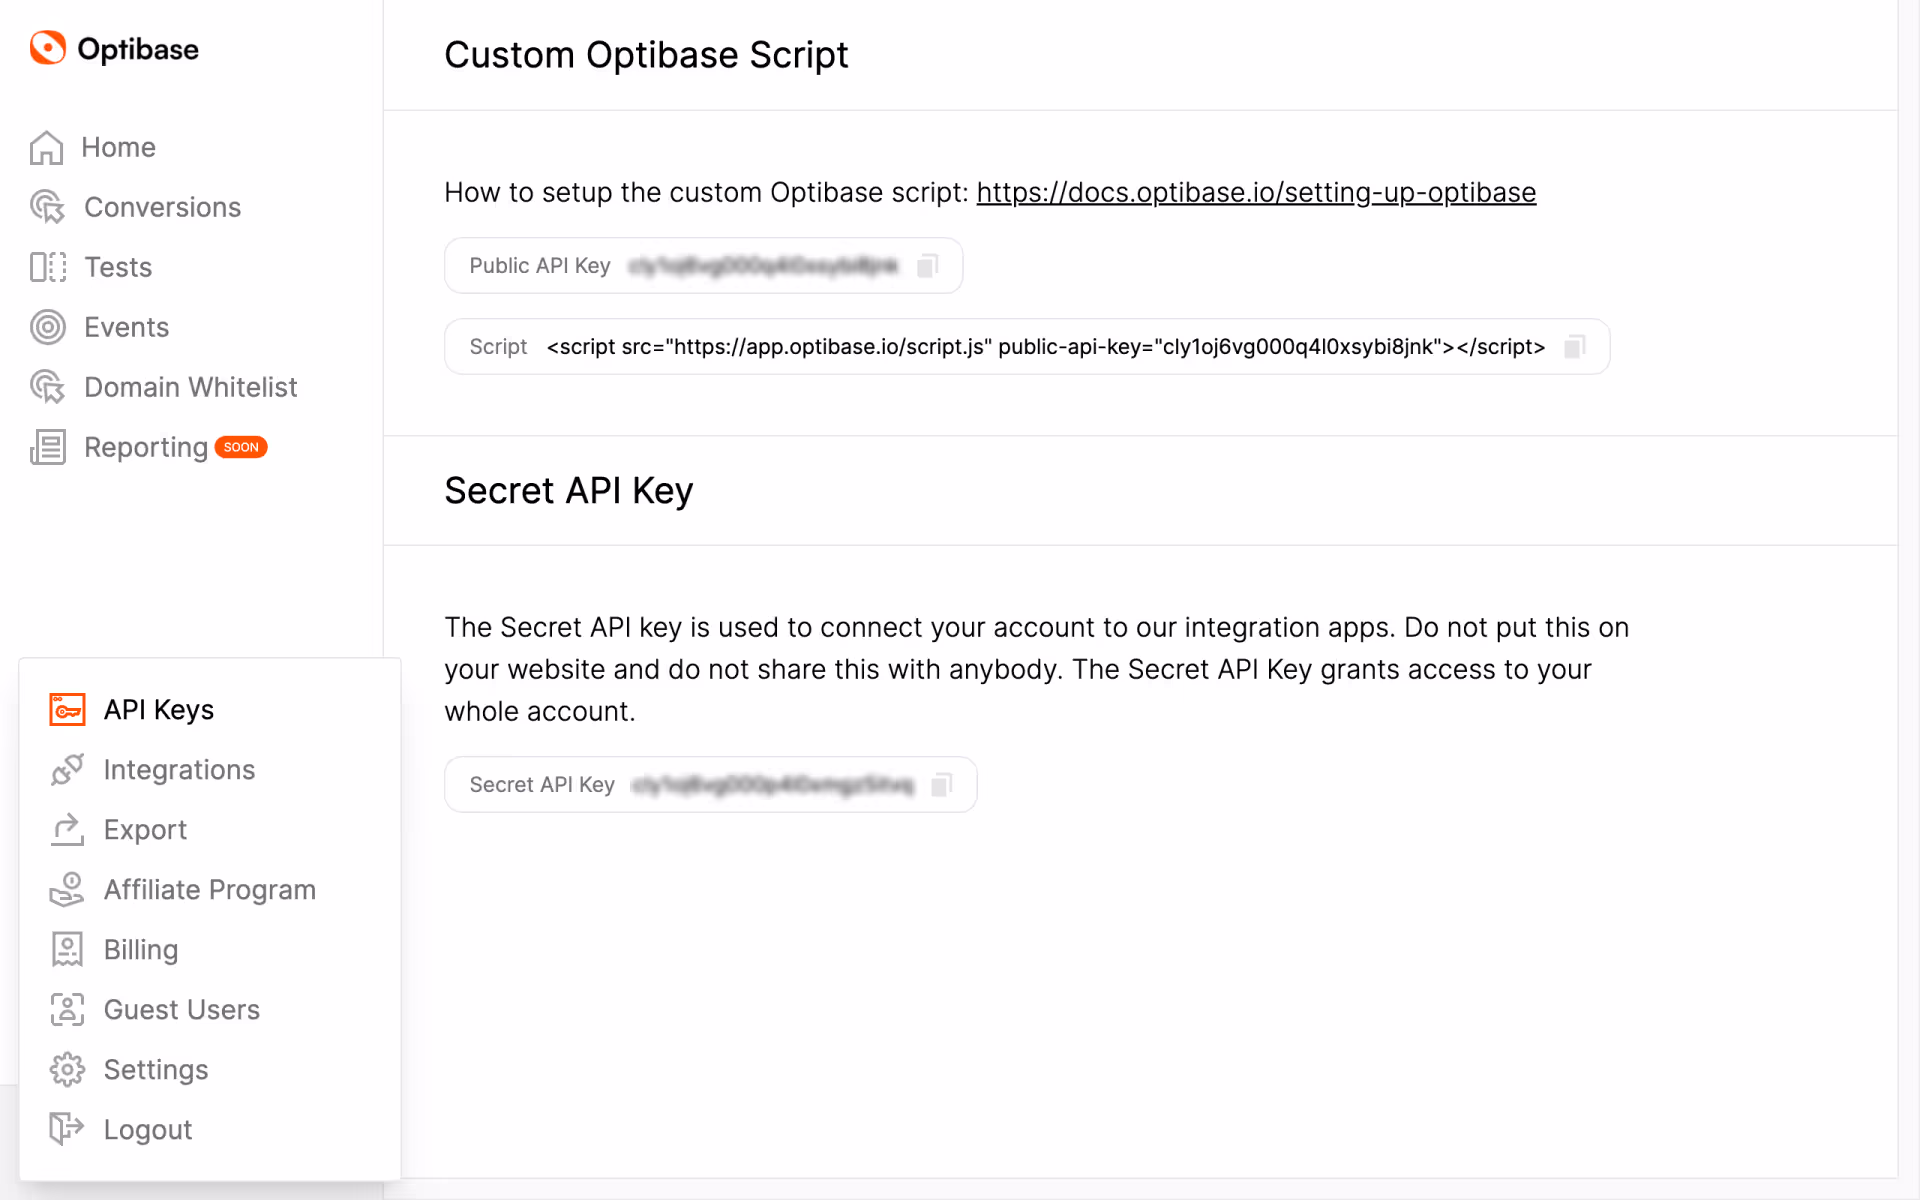
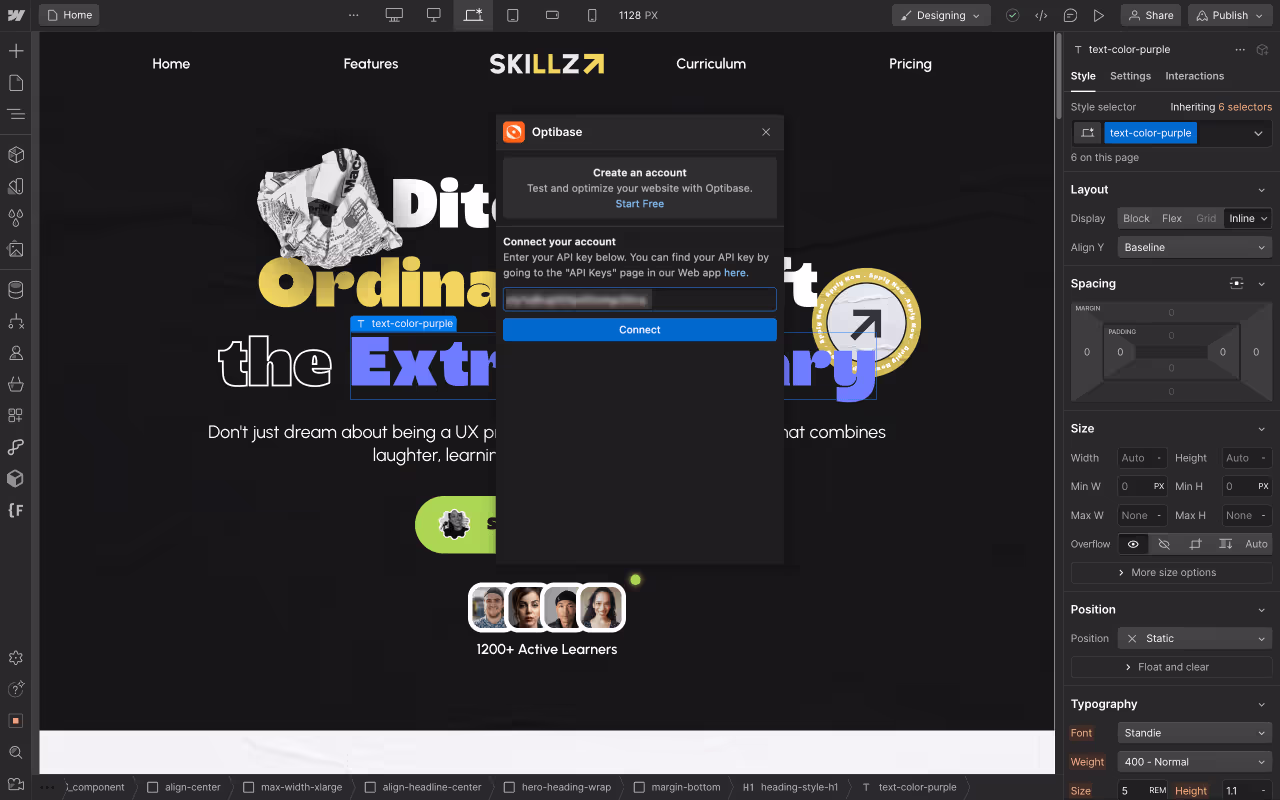
1. Generate API Key: In the Optibase web app, click on your profile > select API Keys > copy the secret API key
2. Authorize Access: Open apps in your Webflow Designer (Press E) and paste the secret key. Then hit ‘connect’
Step 4: Install the Optibase Script
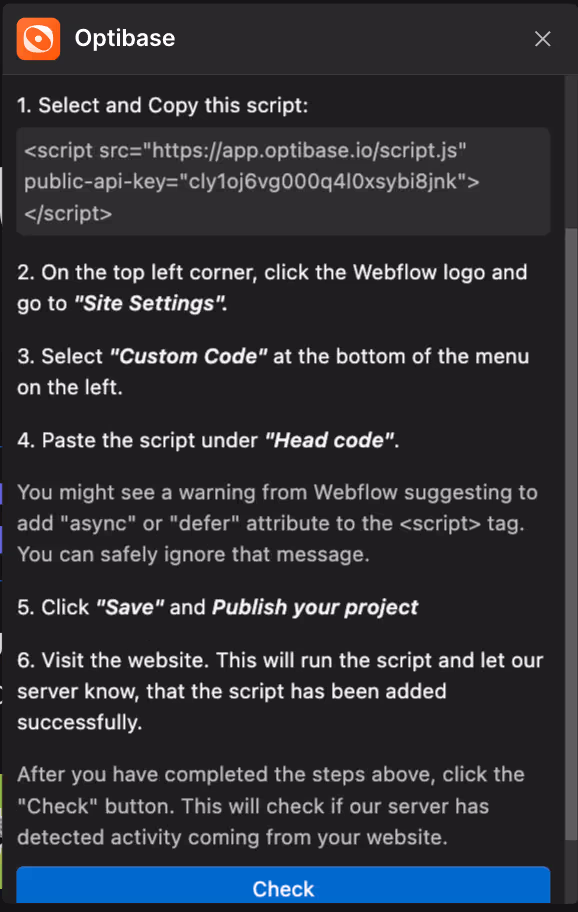
Next, you’ll be asked to install a script on your site.
1. Copy the Script: From the popup, copy the given script.
2. Add Script to Webflow:
Go to your Webflow dashboard.
Navigate to Project Settings > Custom Code.
Paste the Optibase script into the Head Code section.
Save changes and publish your site.
Step 5: Create Conversion Goals
Once you publish and verify the connection, you can start creating your first A/B test.
1. Define Conversion Goals: The first step is to define the conversion goal you want to track. For this example, we'll set goals for ‘Scroll Depth’ and set it to 50% scroll.
Step 6: Create a New A/B Test
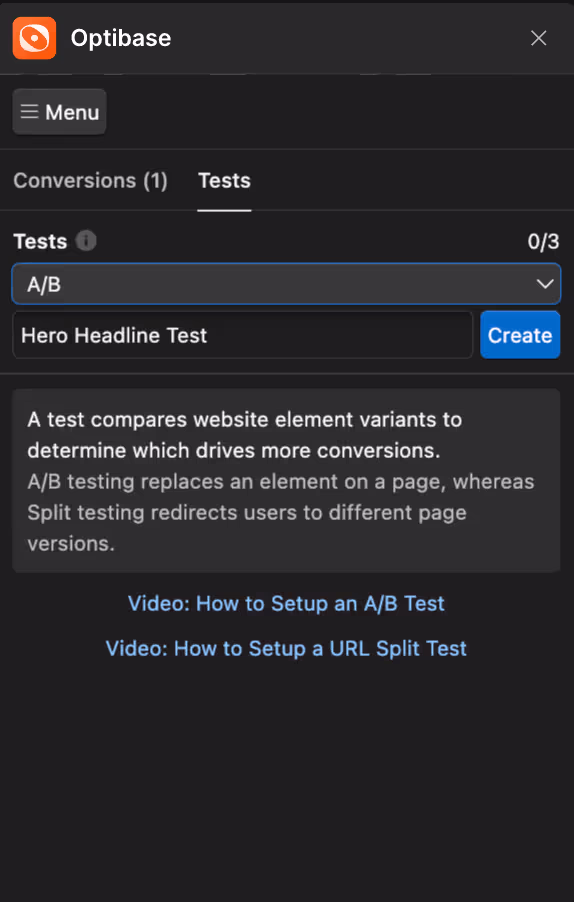
Next we’ll move on to creating your first A/B test in Optibase.
1. Start a New Test: In the same popup, click on 'Tests' and select 'A/B Test' from the list of test types.
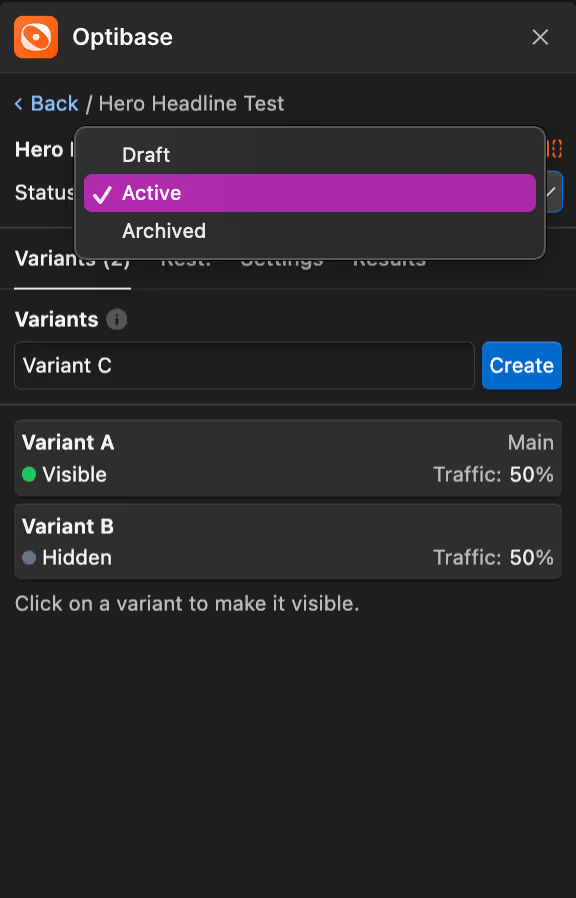
2. Name Your Test: Enter a name for your test, such as "Hero Headline Test", and hit ‘create’
Step 7: Design Your Variations
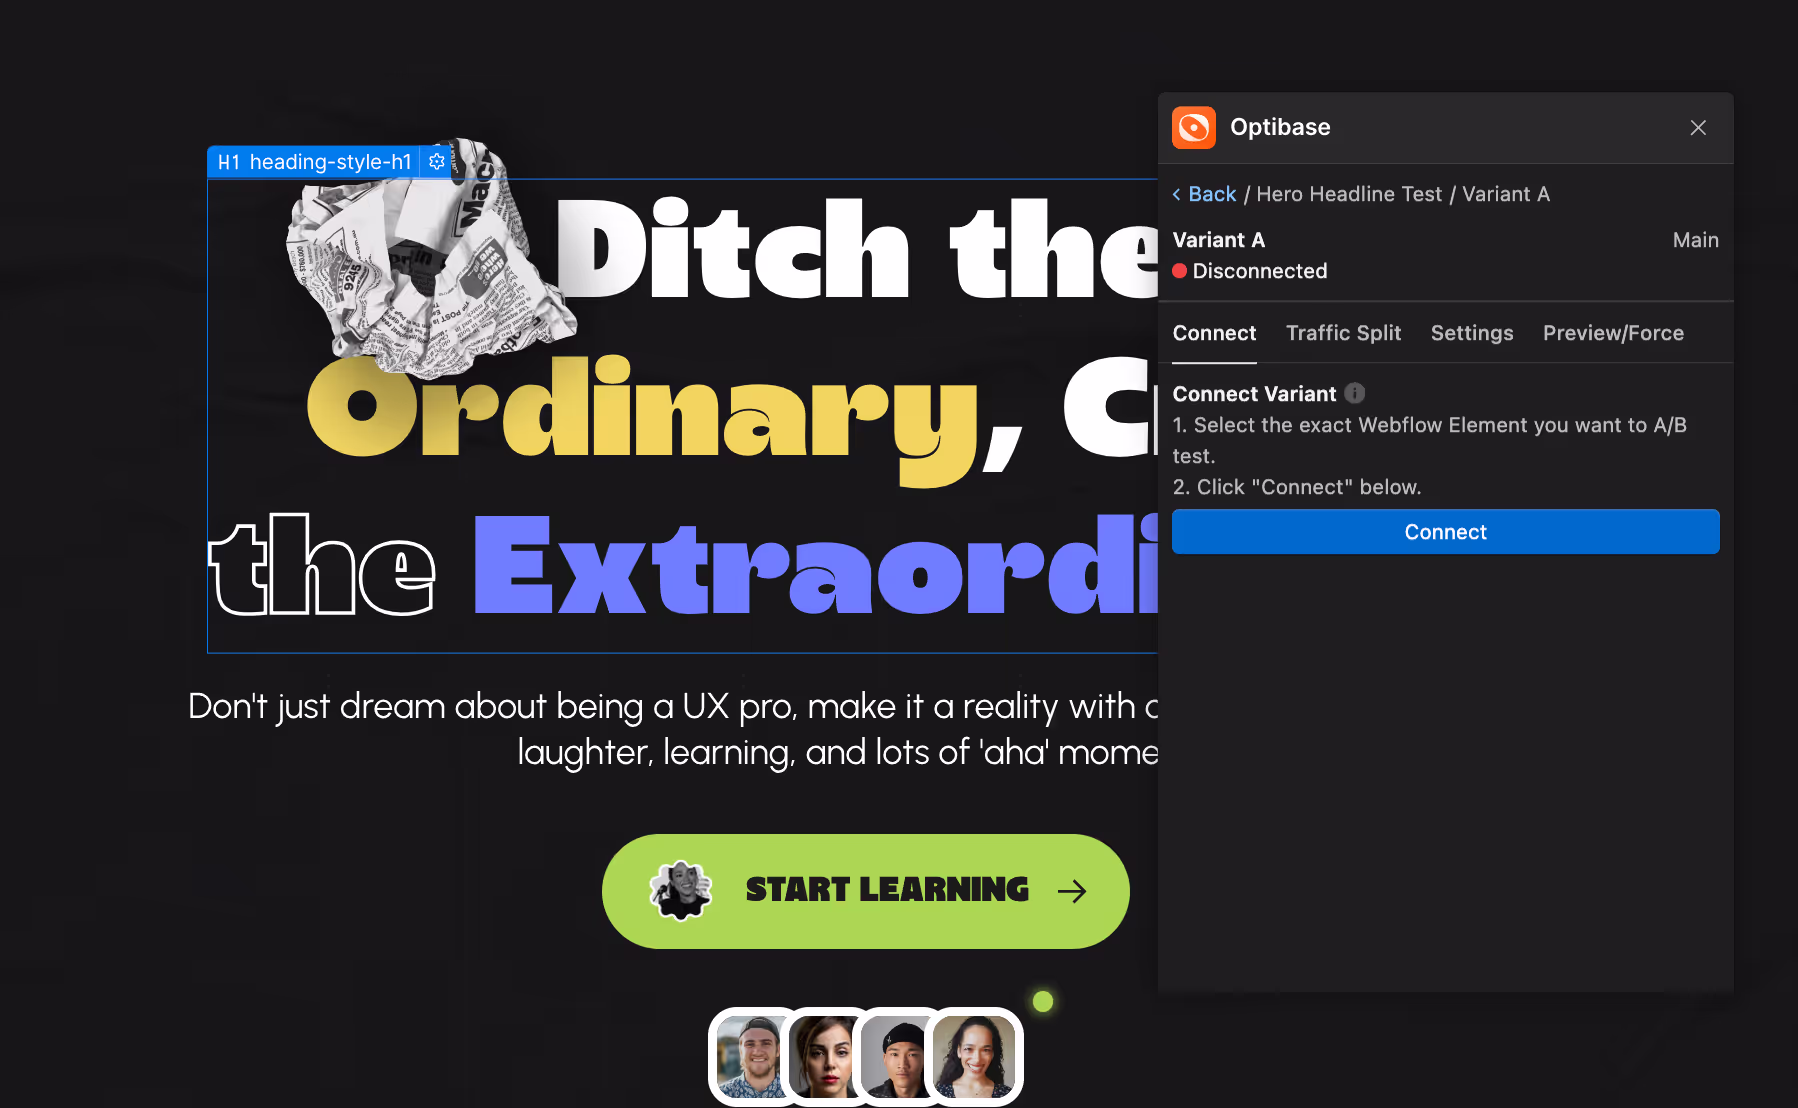
1. Create Variations: Now, we’ll move on to creating variants to test the headlines.
Create your first variant > select the hero heading element > click ‘connect’. This becomes your variant A
Similarly, create a Variant B, but this time, duplicate the hero heading, and select that before you connect.
You can now change the content of Variant B to test both headings.
Step 8: Set Restrictions
You can also add restrictions to your tests such as showing it only on desktop devices or testing only on a specific country. By default, the test will run on all devices and show to all audiences.
Step 8: Run The test
Once you are made changes in your variations and set your desired restrictions, change the status of your A/B test from ‘Draft’ to ‘Active’, and your tests will begin.
There you have it! You’ve successfully set your first A/B test using Optibase.
Once your test has had adequate time to run, you can review your results in Optibase Web app dashboard or on the Webflow app, and find out which version your users resonated with the most. This will be your winner variant.
Step-by-Step: Running an A/B Test with Webflow Optimize
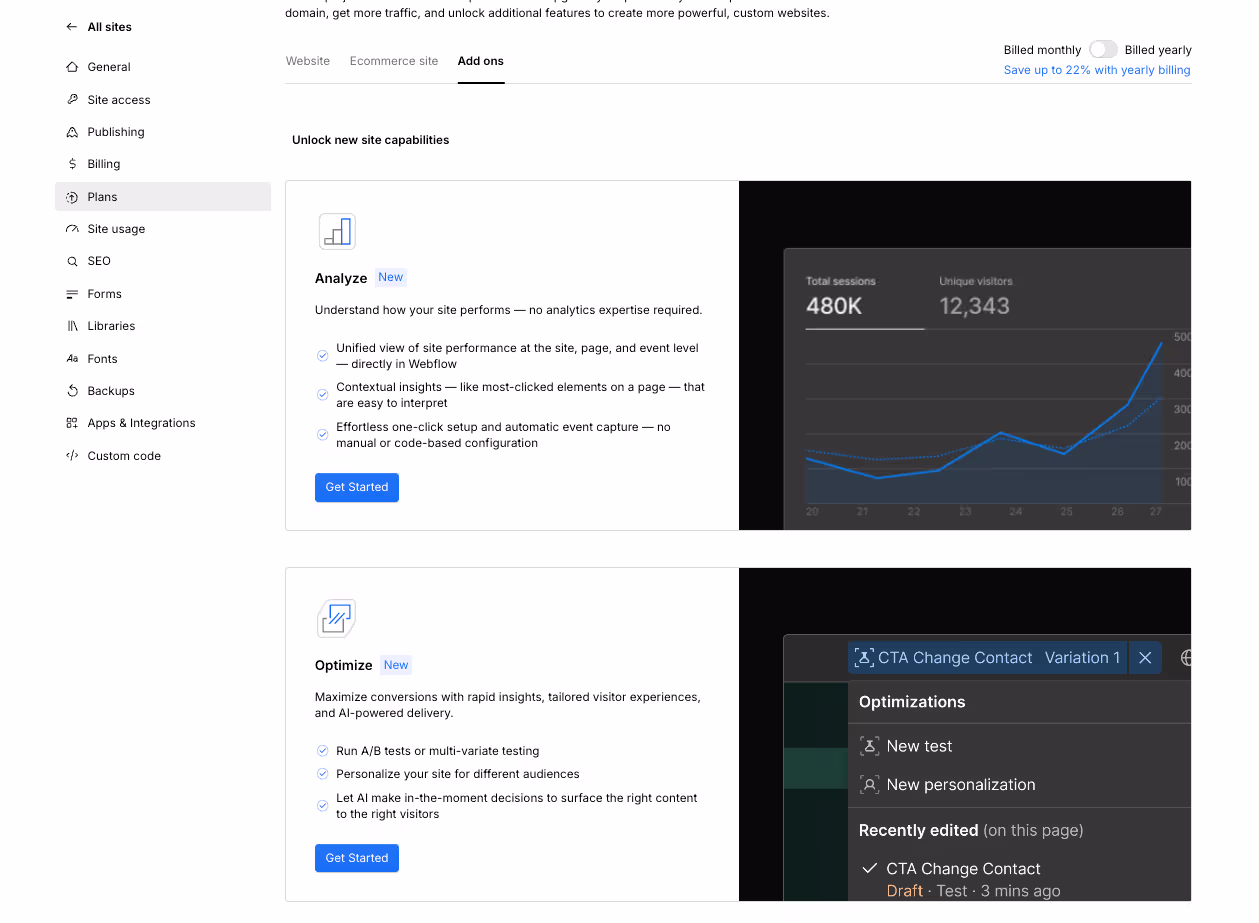
1. Enable Optimize on your Webflow plan. Webflow Optimize is available as an add-on. Once activated, you'll see the Optimize panel in your Webflow project settings.
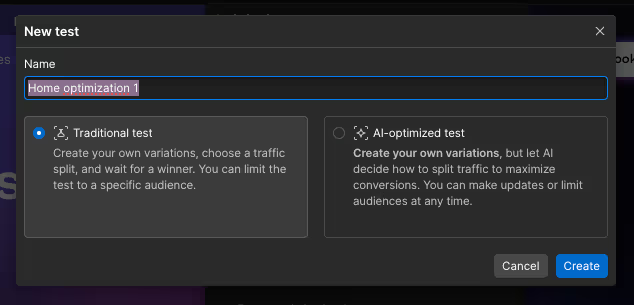
Create a new experiment. Navigate to the Optimize dashboard and click "New Experiment." Choose between an A/B test (two or more page variants) or a personalization rule (targeted content for specific audiences).
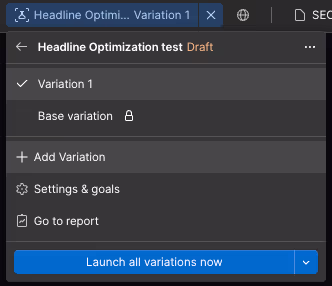
Build your variant in the Designer. Unlike third-party tools, you create variants directly in the Webflow Designer. Duplicate your original page or section, make your changes, and assign it as Variant B. No external visual editors or code overlays needed.
Define your conversion goal. Set what counts as a conversion — form submissions, button clicks, page visits, or custom events. Optimize tracks these natively without additional scripts.
Set your audience targeting. Choose who sees the test: all visitors, specific device types, geographic locations, UTM sources, or — with enterprise integrations — specific companies or CRM segments.
Choose your traffic allocation. Split traffic manually (e.g., 50/50) or enable AI-powered allocation, which automatically sends more traffic to the better-performing variant as data accumulates.
Launch and monitor. Activate the test. Optimize's dashboard shows real-time performance for each variant, including conversion rates, statistical significance, and confidence intervals.
Implement the winner. Once the test reaches significance, Optimize lets you publish the winning variant as the permanent version with one click, no manual page swaps or redirects needed.
Best Practices for A/B Testing
Now that you know how to run A/B tests using both tools, we’ll move on to learning some testing best practices to make sure your A/B tests get you the best results.
1. Test One Variable at a Time
When running an A/B test, focus on one variable at a time. This could be the headline, CTA button, or any other element on your page. Testing multiple variables simultaneously can make it difficult to pinpoint which change led to the observed results.
2. Set Clear Goals
Define what success looks like before starting your test. Whether it's increasing click-through rates, form submissions, or sales, having clear goals will help you measure the effectiveness of your variations.
3. Ensure Statistical Significance
Run your tests long enough to gather sufficient data. Statistical significance ensures that the results of your test are reliable and not due to random chance. Use tools within your A/B testing platform to help determine when you've reached significance.
4. Use a Representative Sample Size
Make sure your test includes a representative sample of your audience. This means your traffic should be split evenly between the control and variation groups to get accurate and meaningful results.
5. Document Your Tests
Keep detailed records of all your tests, including hypotheses, variations, metrics, and results. This documentation will help you learn from past tests and refine your testing strategy over time.
6. Continuously Test and Iterate
A/B testing is an ongoing process. Continuously test new ideas and iterate on successful variations to keep optimizing your site.
7. Use Heatmaps and Session Recordings
Complement your A/B testing with heatmaps and session recordings to gain deeper insights into user behavior. These tools help you understand how users interact with different elements on your site, providing context for your A/B test results.
8. Segment Your Audience
Segment your audience based on factors like location, device type, and user behavior to tailor your tests to specific groups. This can help you identify which variations work best for different segments of your audience.
9. Avoid Testing During Major Changes
Avoid running A/B tests during significant site changes or marketing campaigns. External factors can skew your results, making it hard to isolate the impact of your variations.
10. Analyze and Implement
After your test concludes, analyze the data thoroughly. Determine which variation performed better and why. Implement the winning variation, but keep testing new ideas to continually improve your site's performance.
A/B Testing and SEO: What You Need to Know
A/B testing can inadvertently hurt your search rankings if you're not careful with the technical setup. Here's how to avoid the common pitfalls:
Use canonical tags. If you're running split URL tests (different URLs for each variant), add a rel="canonical" tag on the test variants pointing to your original page. This tells search engines which version to index and prevents duplicate content issues.
Don't cloak. Cloaking - showing one version to search engine crawlers and a different version to users, violates Google's guidelines and can result in penalties. Make sure your testing tool serves the same variants to both bots and users. Most modern tools handle this correctly by default, but it's worth verifying.
Avoid noindex on test pages. Some teams add noindex tags to variant pages as a precaution. This is generally unnecessary if you're using canonical tags correctly, and can cause problems if you accidentally leave them on after the test ends.
Keep tests to a reasonable duration. Google recommends not running tests for "unnecessarily long" periods. One to four weeks is standard. If your test has reached statistical significance, implement the winner and move on.
Watch your page speed. Third-party testing scripts can add weight to your page. Monitor your Core Web Vitals during tests, if a tool's JavaScript is slowing your site noticeably, it could negatively impact both conversions and rankings. Native tools like Webflow Optimize have an advantage here since they don't require external script injection.
AI-Powered A/B Testing: What's Changed in 2026
When Webflow acquired Intellimize in 2024, it signaled a fundamental shift: A/B testing and AI-driven personalization were becoming native to the platform, not bolted on through third-party tools.
That shift is now fully realized. Here's what AI-powered testing looks like in practice:
Automated traffic allocation. Traditional A/B tests split traffic 50/50 and wait for statistical significance. AI-powered tools like Webflow Optimize and Optibase's AI traffic split dynamically route more visitors to the variant that's winning, in real time. This means faster results and less revenue lost to underperforming variants during the test period.
AI-generated variants. Instead of manually creating 2-3 variations, AI can generate dozens of headline, CTA, and layout combinations based on your content and goals. The system tests them simultaneously and surfaces winners without you having to design each one.
1:1 personalization at scale. The line between A/B testing and personalization has blurred. AI doesn't just find a single "winner", it finds the best version for each visitor segment (or even each individual visitor) based on behavior, device, location, referral source, and firmographic data. The result is a website that's continuously optimizing itself.
Predictive analytics. AI models can now predict which variant will win before reaching traditional statistical significance thresholds, allowing teams to make confident decisions faster, especially useful for lower-traffic sites where tests historically took weeks to conclude.
This doesn't mean you should stop thinking about what to test. AI is exceptional at optimizing execution, but the strategic decisions, what to test, why, and what the results mean for your product, still require human judgment.
Test. Iterate. Optimize
Remember, A/B testing is an ongoing process. The more you experiment, the more you’ll be able to understand your audience, and what moves them. By following these steps and using tools like VWO and Optibase, you can effectively run A/B tests and continuously improve your website's performance. Happy testing!
Get your Webflow SEO Google sheet checklist
Short description on the benefits or value you’ll get from using this checklist
Organizes SEO tasks for efficiency
Simplifies keyword tracking and management
Ensures consistent on-page optimization efforts
Thank you! Your submission has been received!
Oops! Something went wrong while submitting the form.
Frequently Asked questions
What is A/B testing and why is it important?
How do I set up A/B testing on Webflow?
What are the best tools for A/B testing on Webflow?
How long should I run an A/B test?
Can A/B testing improve SEO?
What should I test in an A/B test?
How do I analyze A/B test results?
Is A/B testing suitable for small websites?
What is Webflow Optimize and how is it different from third-party tools?
Can A/B testing hurt SEO?
About the Author
Cade Biegel
Co-founder of Amply, leverages his expertise in design, CRO, SEO, and storytelling to drive accelerated growth for B2B brands through captivating websites and marketing techniques.
A complete Webflow maintenance checklist for monthly, quarterly, and annual tasks, including performance, SEO, CMS, integrations, and more. Keep your site sharp.
Handing your Webflow site to an agency doesn’t mean giving up control. Here’s exactly how to do it right: access, assets, integrations, and boundaries.
Rajat Kapoor
10
min
Our Portfolio
Explore Our Resource Collections
Amply Academy
Learn Web design, webflow, and web design best practices, all tailored to help you grow your B2B business
.avif)


-min.avif)


.avif)


.avif)